
18 November 2026
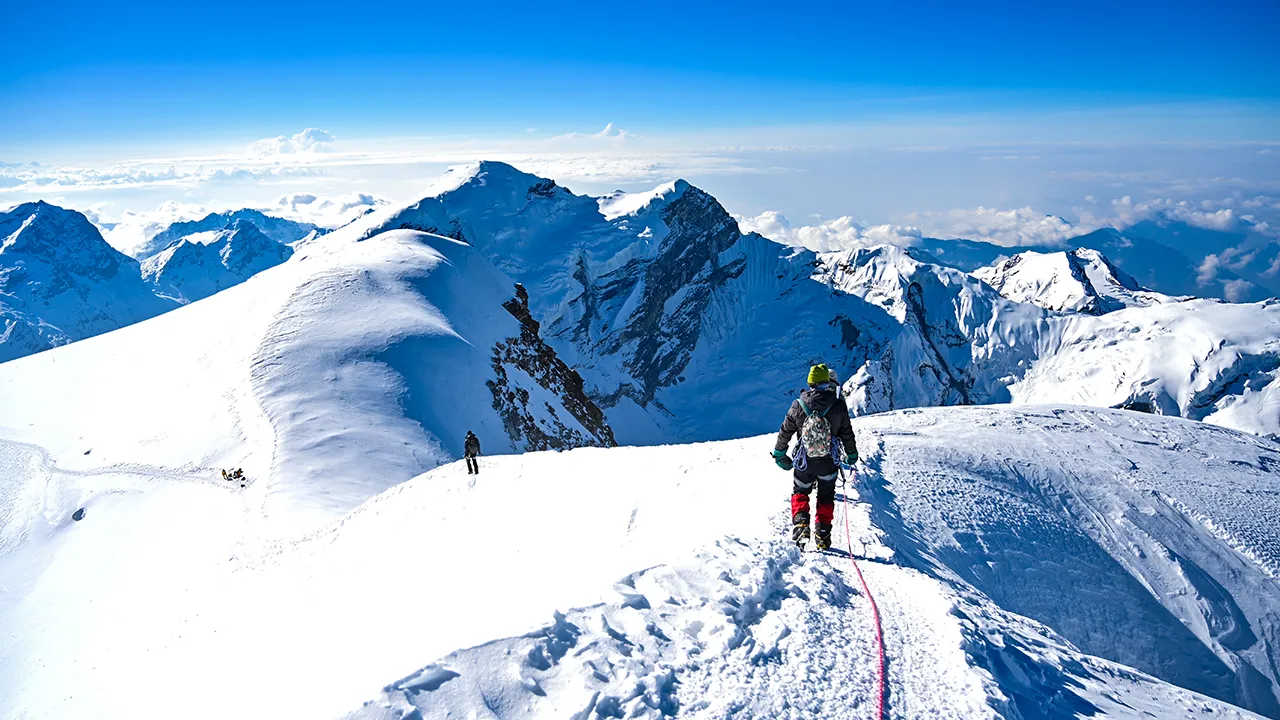
If you are going for a Himalayan trek adventure, then it is not just about planning the perfect itinerary, especially if you are a first-time trekker! You must learn about the gear you will require during the trek. Yes, there are different types of gear, and just one piece of gear might not work for every trek. Now, there are many factors that determine what you need to carry, such as the route, weather, terrain, and presence of snow or ice.
That’s why it is absolutely necessary to understand the difference between trekking gear and technical gear. This helps you prepare better for the necessities of your adventure. In this guide, you’ll explore what each piece of equipment is, how it works, why it matters, and when you need it. You’ll also learn how gear requirements change between non-technical treks and high-altitude mountaineering expeditions, thus helping you understand what your chosen route demands before heading into the mountains.
Let’s begin….
Let’s begin with trekking gear. Now, this includes the essential equipment required to stay comfortable, protected, and prepared on short day hikes to multi-day Himalayan trek trails. The right gear helps you handle any condition: changing weather, uneven terrain, long walking hours, etc. Check out this list of trekking gear, and learn more about it:
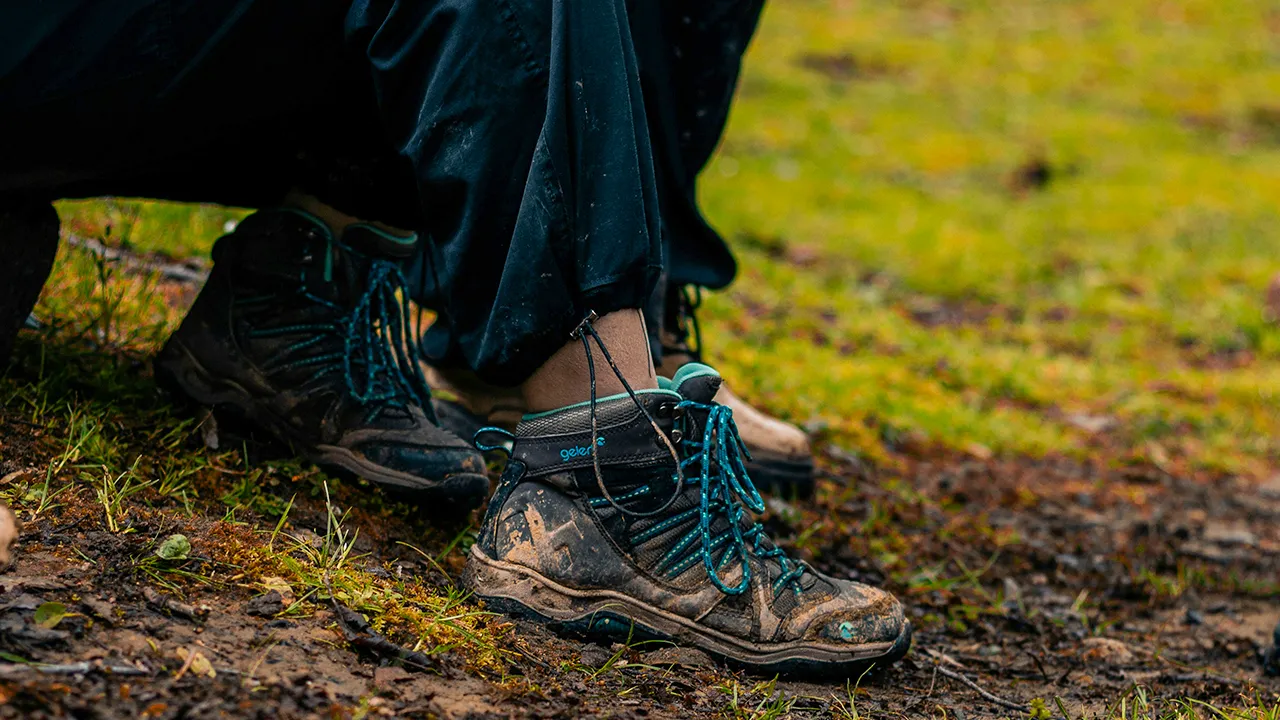
Your footwear is undoubtedly one of the most important pieces of trekking gear. A good pair gives you firm grip on uneven terrain, protects your feet from rocks and rough surfaces, and remains comfortable when you need to trek for several hours with a backpack. There are two options you can choose from: trekking shoes and trekking boots. The right choice, however, depends on the kind of trek you are doing. Here is how they differ:
These two terms are often used interchangeably, but they are different and are used for different reasons. Thus, it becomes critical to know about them. Trekking shoes are better for treks where you want more freedom of movement, while boots can be useful on rougher terrain or when carrying a heavier backpack. Remember, your footwear should match the trail rather than the idea that “more gear is always better.” Check out this table below:
| Trekking Shoes | Trekking Boots | |
|---|---|---|
| Weight | Generally lighter | Generally heavier |
| Ankle Coverage | Low | Higher |
| Movement | More flexible | More supportive |
| Best suited for | Day hikes and easier trails | Rougher, longer and more demanding trails |
| Backpacking | Light to moderate loads | Moderate to heavier loads |
| Comfort | Easier to move in for many hikers | More structured/sturdy and protective |
Look at four things first: grip, protection, support, and fit.
For shoes and boots alike, the outsole is responsible for traction, so a good pair should have a tread pattern suited to the surfaces you are likely to encounter. The midsole provides cushioning and helps absorb some of the impact of walking over hard or uneven ground, while the upper protects your feet from rocks, dust, and other trail hazards.
Then comes the part that is easy to underestimate: fit. Even an expensive pair can become a problem if it does not fit your foot properly. Your heel should feel secure without excessive movement, your toes should have enough room, and there should not be uncomfortable pressure points. Remember that your feet can swell during long hours of walking, so trying footwear with the socks you intend to trek in is a good idea.
|
Pro tip:
If you are buying trekking footwear for the first time, don't choose it based only on how it looks or how “rugged” it appears. Think about the terrain you will actually be walking on, the season, your backpack weight, and how often you plan to trek. |
TTH Trek Expert Recommended Brands
If you are looking for some good shoes for your trekking journey, you can check out brands like Decathlon [mh100] and Himmaleh. They have budget friendly options that also comply with the requirements criterias of the trek.
"Still confused? Check out our detailed trekking shoes guide to make the right choice for your next trek."
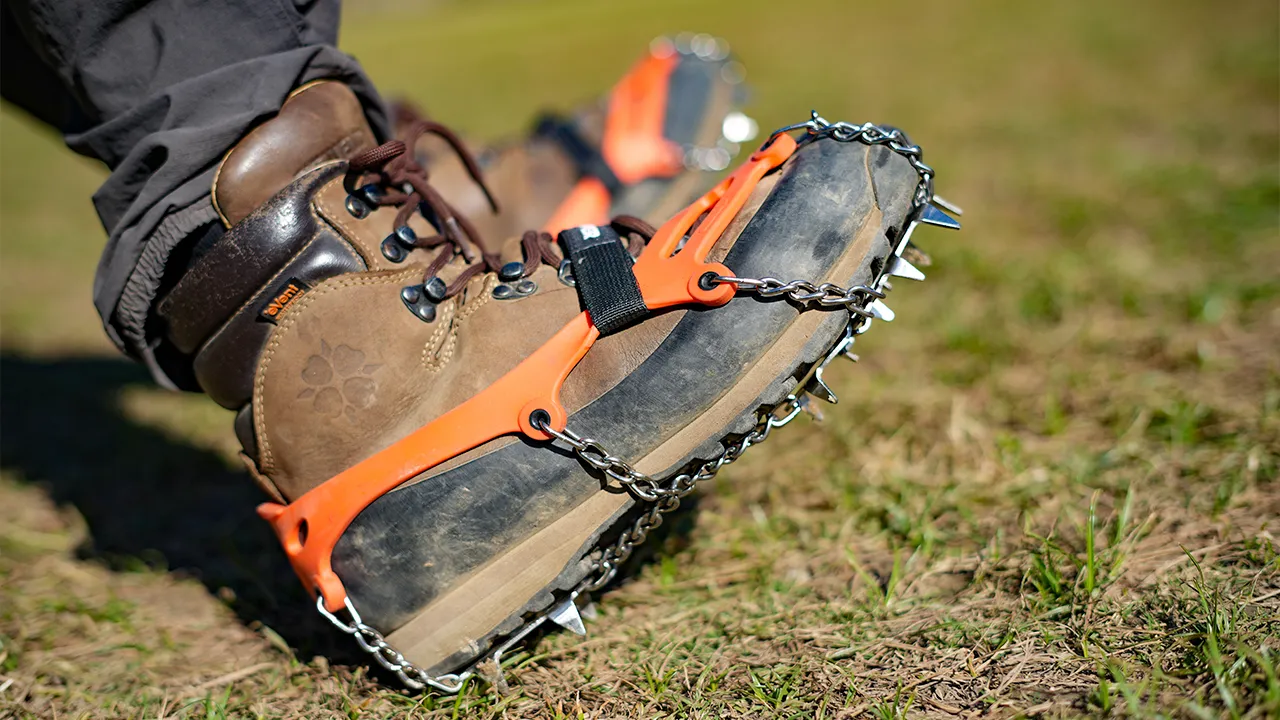
Microspikes are lightweight rubber attachments with small metal points or chains underneath them. They are useful when the trail becomes slippery or covered with compacted snow, giving you better grip and confidence while walking; especially handy on winter treks where you may encounter frozen sections. The spikes sit underneath your footwear and are held in place with a flexible harness or similar attachment system. So you can fit them over your trekking shoes when you reach a slippery section and remove them when you are back on clear ground.
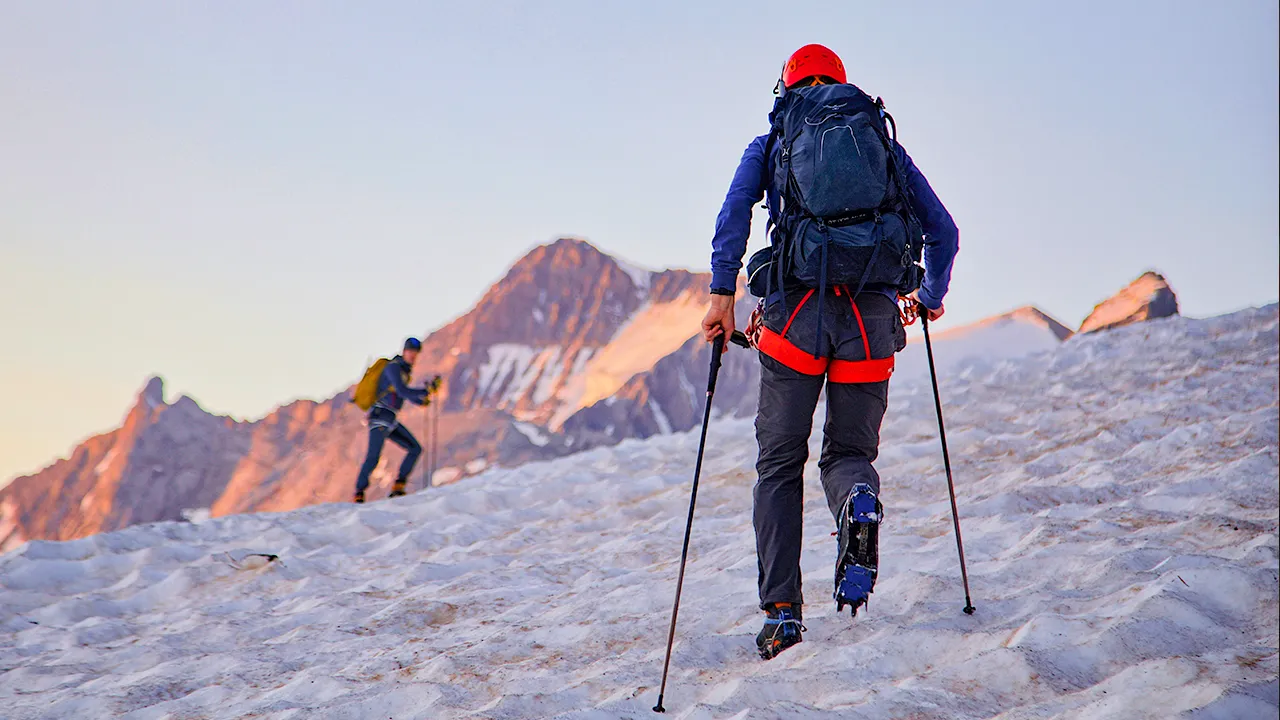
The trekking poles may seem like ordinary walking sticks, but they matter a lot on longer trails. Want to know how? Well, to put it simply, they provide additional points of contact with the ground, helping you maintain balance. This helps to evenly distribute your upper body and backpack weight, especially while walking downhill with a backpack. A plus point is that these poles are adjustable so they can be easily altered according to the terrain. You can shorten the length while going uphill or extend it if you're coming downhill. Also, the wrist straps allow you to keep control without clenching the handles.
They are very helpful on long rides with high hills and valleys, on rough ground, and in areas that require additional balance. But they are not a must-have for every hike. You might need to store them in some narrow or technical sections to free up your hands.
"Check out detailed trekking pole guide to understand how trekking poles can make a difference on the trail."
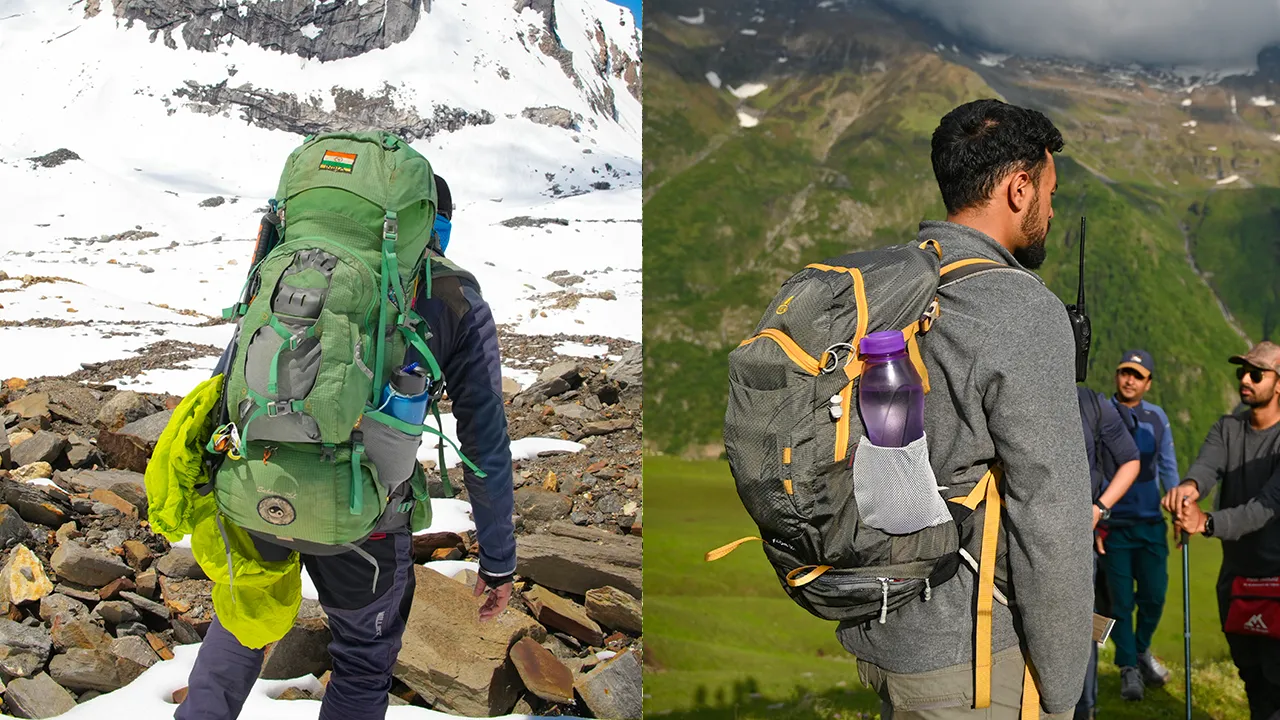
Trekking backpacks and daypacks are similar in many ways, except for how much you'll carry and for how long. A daypack is meant for a day out that requires only basic items, while a trekking backpack can be used for a multi-day trek when extra clothing, food, sleeping gear, and equipment will be needed.
A daypack is generally used for:
A larger trekking backpack is used for multi-day journeys and may carry:
Even so, the comfort of carrying all that weight will also depend on the backpack itself. A properly fitted trekking backpack distributes the weight toward the hip belt, while the shoulder straps keep the pack in the right position. Compression straps make sure that the contents remain stable and do not shift in the backpack as you move.
Also, remember, bigger does not always mean better. The ideal capacity depends on the duration of the trek, the equipment you need to carry, and what is already provided by the trekking organisation. Carrying unnecessary items can quickly turn extra backpack space into extra weight on your back.
TTH Trek Expert Recommended Brands
For backpacks, there are plenty of options. But the best budget-friendly backpacks can be found at Decathlon and Wildcraft.
If you want to go for premium options, check out brands like Osprey and Deuter.
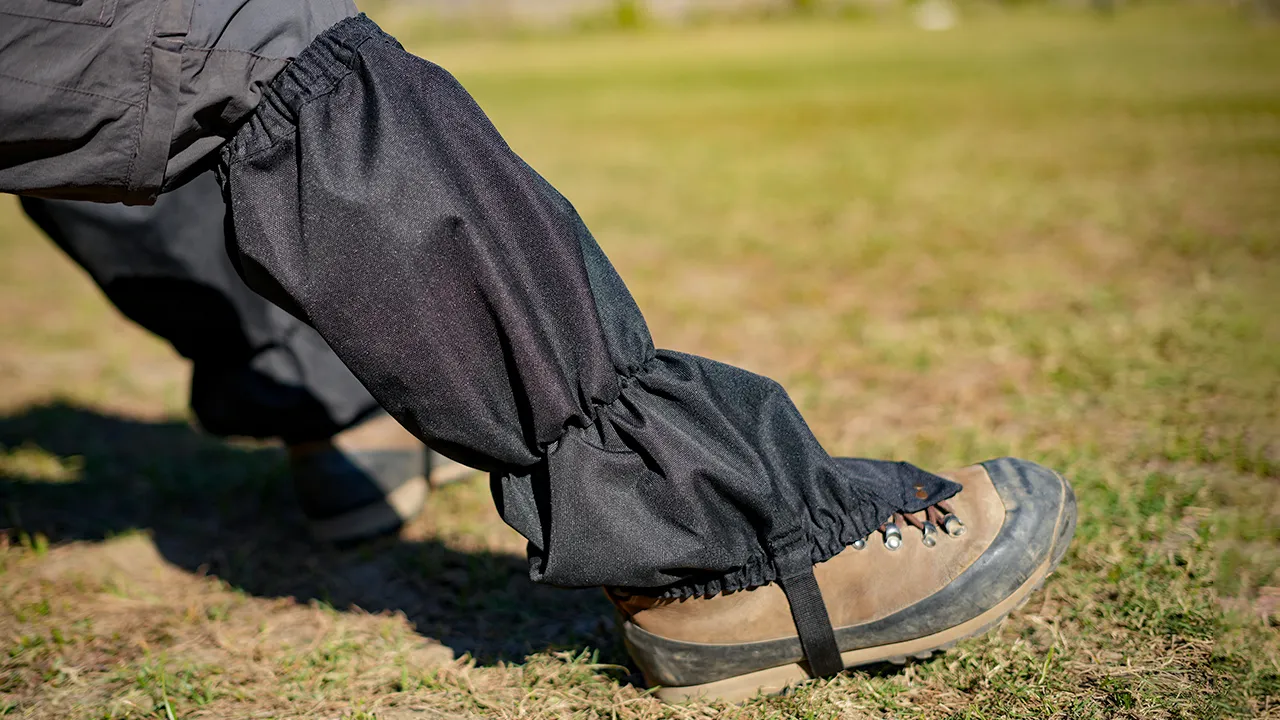
Gaiters are protective covers worn over the lower leg and the upper part of your trekking footwear. They seal the gap between your trousers and shoes, reducing the entry of small debris, dust, water, mud, and snow into your shoes. They are particularly helpful when hiking in snow, wet trails, or muddy areas.
Their role is even more evident on a snow trek. When walking in snow, it can fall over the top of your shoes and into your socks. Gaiters form a barrier around this opening to help keep your feet and lower legs protected. Most trekking gaiters are secured around the calf and have a strap or hook that connects around the footwear to keep them in place.
|
Quick Tip:
Gaiters are most effective when properly used. Make sure the bottom strap sits securely under the sole area of your footwear and that the gaiter completely covers the opening around your shoe. Otherwise, a loose or improperly fitted gaiter can let snow and debris in. |
And one important distinction: gaiters do not make a trekking boot waterproof! They primarily cover the area around the opening in your shoes and lower legs, so your footwear itself must offer additional protection from water and moisture.
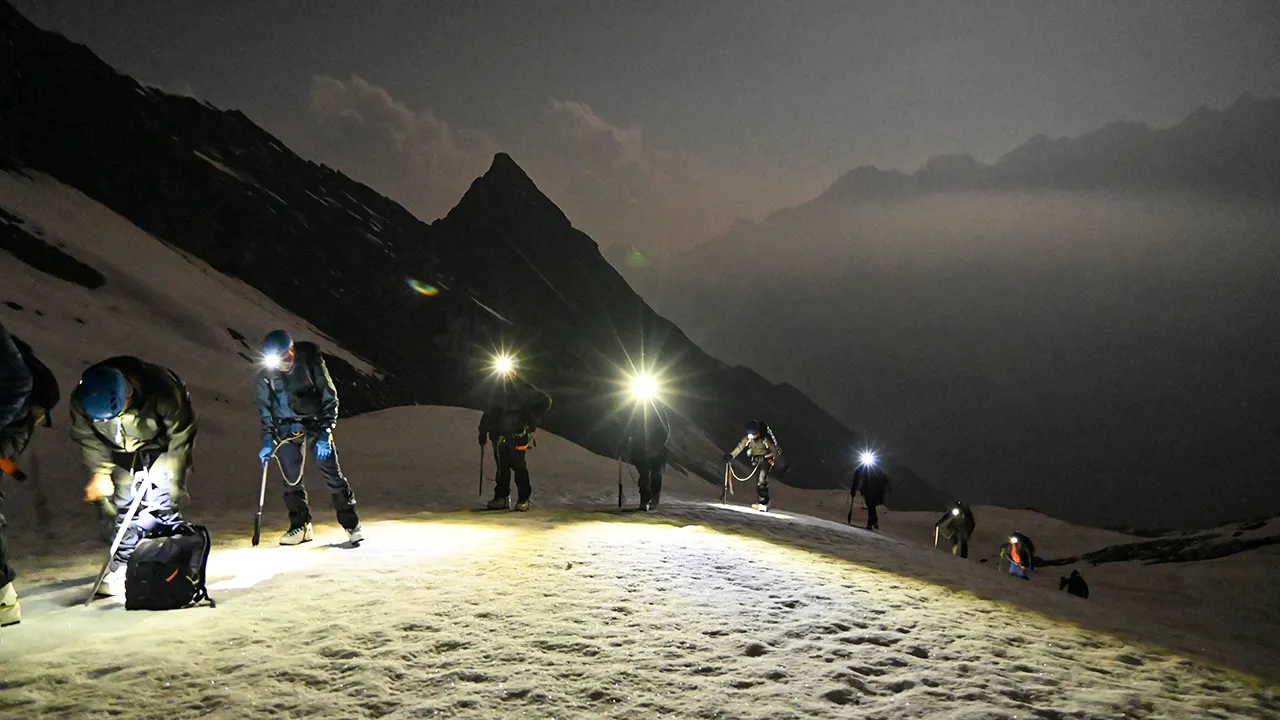
A headlamp is a small piece of trekking equipment that is particularly valuable at night. It is worn around the head, and as compared to normal torches, it gives you a hands-free lighting option so you can see the trail clearly and still have both hands free to use.
Most headlamps use LED lights powered by batteries or a rechargeable battery. Depending on the model, you may have different brightness levels or lighting modes, allowing you to adjust the beam according to your surroundings. A narrow beam is good for looking out for what's coming up the trail, and a broad beam is good when setting up camp or moving around the camp. This is especially critical for multi-day treks, where you should not assume that you will always reach camp before sunset.
|
Quick Tip:
Always check your headlamp before the trek. Carry extra batteries (1-2 minimum) or (if using a rechargeable headlamp) be sure the battery is charged, and make sure to test the light before leaving. Also, when placing it in the backpack, put it in an easy-to-reach place. |
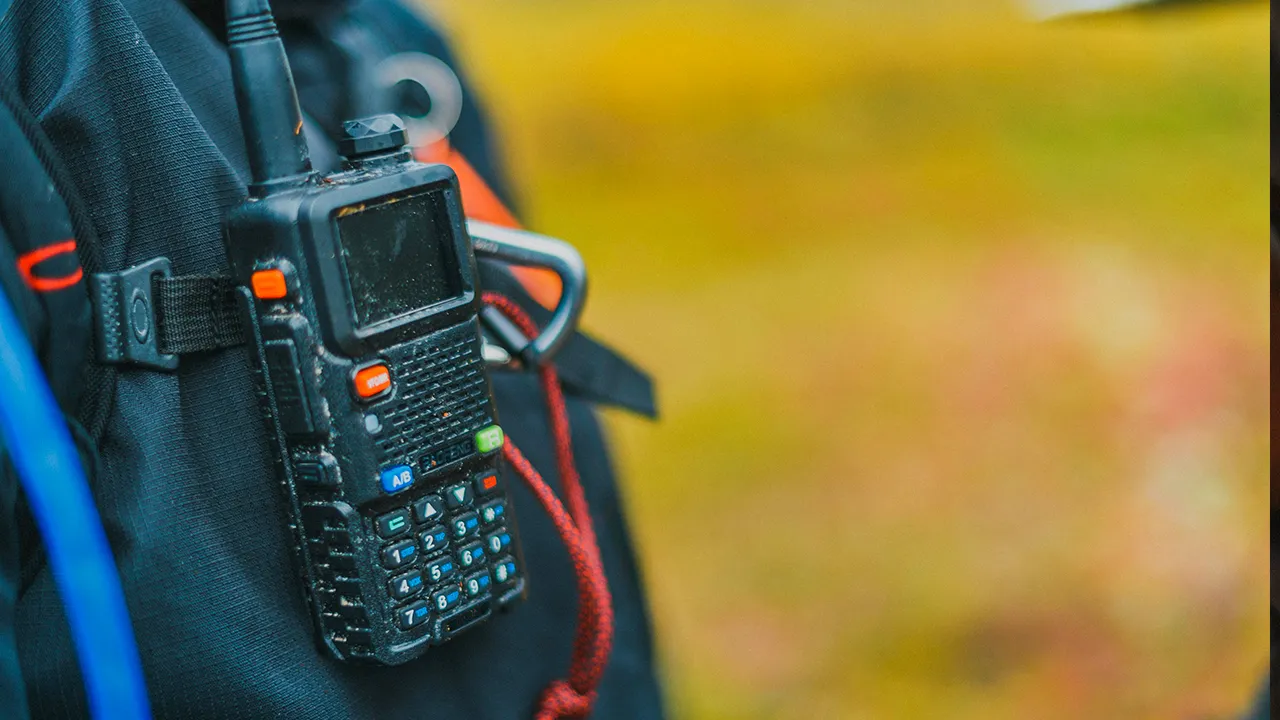
For organised treks, the trekkers commonly follow a mapped-out path supported by the trek team and trek leader(s). But, knowing the route offers a better idea of the route when on new trails, what comes next, and why the team might select a specific trail. Now, getting lost on a Himalayan trail is rarely about not having a map. More often, it comes down to relying on a single navigation method and assuming it will always work. The phone battery can die, the GPS becomes less useful if you don't have the correct offline maps downloaded, and poor visibility can make familiar-looking terrain difficult to read. So, you need to be aware of what you need beforehand.
A basic navigation system for tracks consists of a map and compass, GPS, or an offline navigation system. A map helps you understand the bigger picture - the trail, surrounding terrain, landmarks, and elevation, while a compass helps establish direction. Furthermore, GPS-based tools can then display where you are located on the route.
Also, there must be a backup. Download the maps you need for offline use and charge up your navigation device or phone before entering new areas. If you are relying on your phone, bring a power bank. But don't expect mobile phone coverage to be available everywhere.
|
Mountain-ready rule:
Don't carry a navigation tool just because it appears on a checklist. Be familiar with it before it is needed. A compass is not much of any use if you haven't learned how to use it, and a map is no use if you don't know how to read it. |
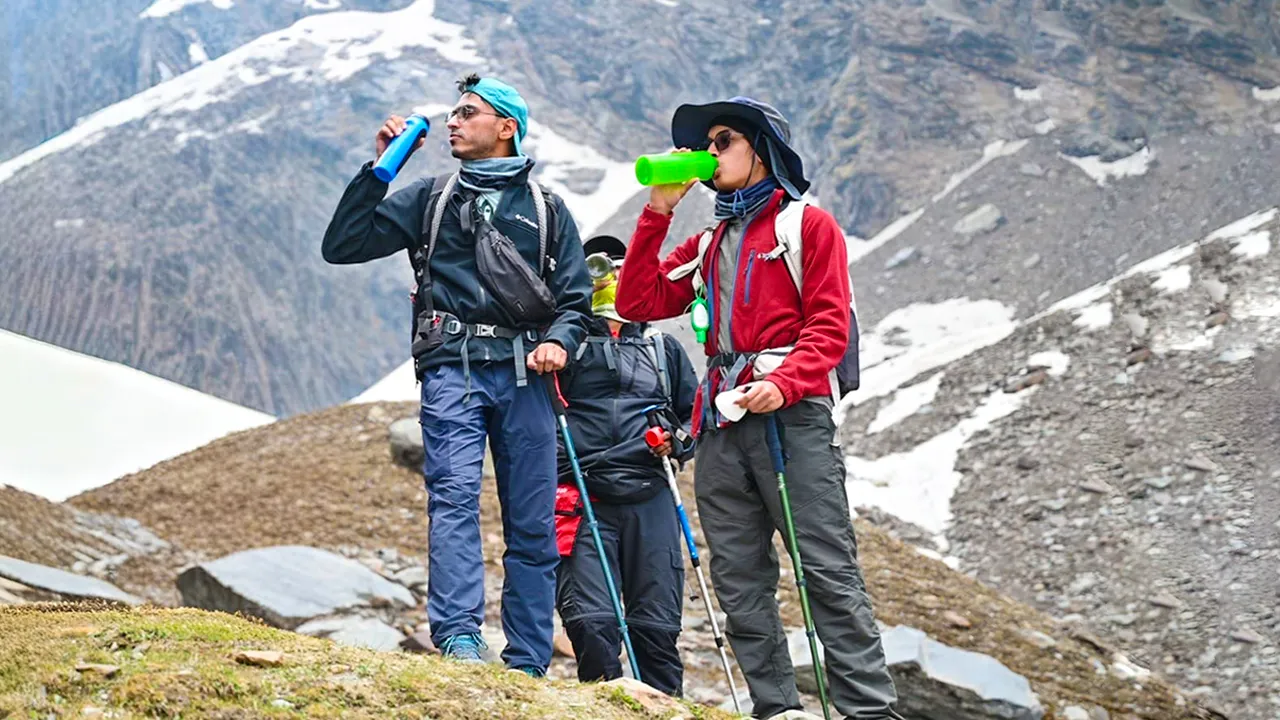
Staying hydrated during a trek is very important, and bottles or water carriers should be functional in both warm and extremely cold weather. Each trekker should have a thermos water container and a normal water bottle or hydration pack.
|
High-altitude tip:
Hydration bladders can be convenient, but in very cold conditions, the water in the tube can freeze. If you are carrying one on a high-altitude or winter trek, use a good insulated cover for the bladder and its drinking tube, and take appropriate precautions based on the conditions. |
What about water purification? On an organised trek, water arrangements can vary by route, so follow the instructions provided for your specific trek and use only water sources considered safe by the trek team. If you’re trekking independently or collecting water from a natural source, carry an appropriate purification method rather than assuming clear-looking mountain water is automatically safe to drink.
TREK SMART! Don’t wait until you’re thirsty to start drinking. Take regular small sips throughout the day, especially during long climbs, and keep your water easily accessible.
"Check out our detailed guide on hydration during the trek, featuring practical tips from our trek leaders."
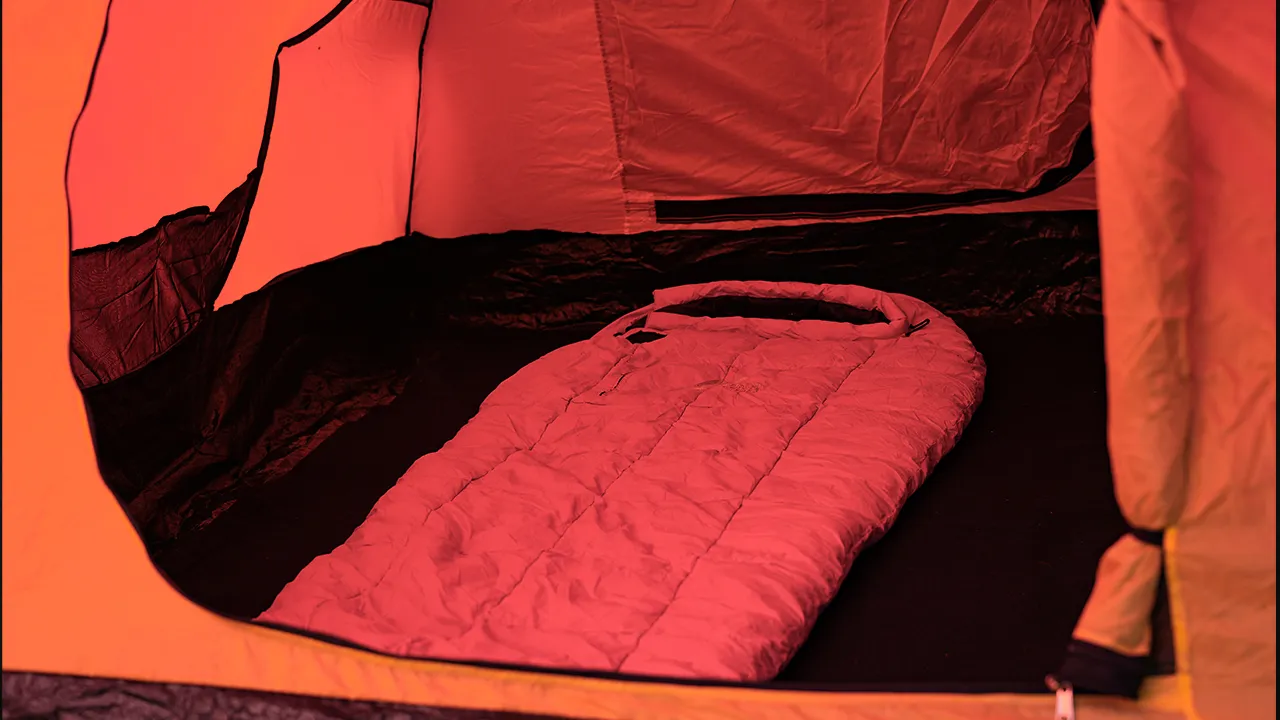
Shelter and sleep systems are an important part of your essential gear. A tent protects you from the surrounding weather, while your sleeping bag and mat work together to keep you warm and comfortable through the night.
For organised treks, these items may be provided as part of the trek equipment, so you don’t necessarily need to purchase or carry your own. If you are camping independently, however, choose your tent, sleeping bag, and sleeping mat according to the season, altitude, expected temperature, and weather conditions.
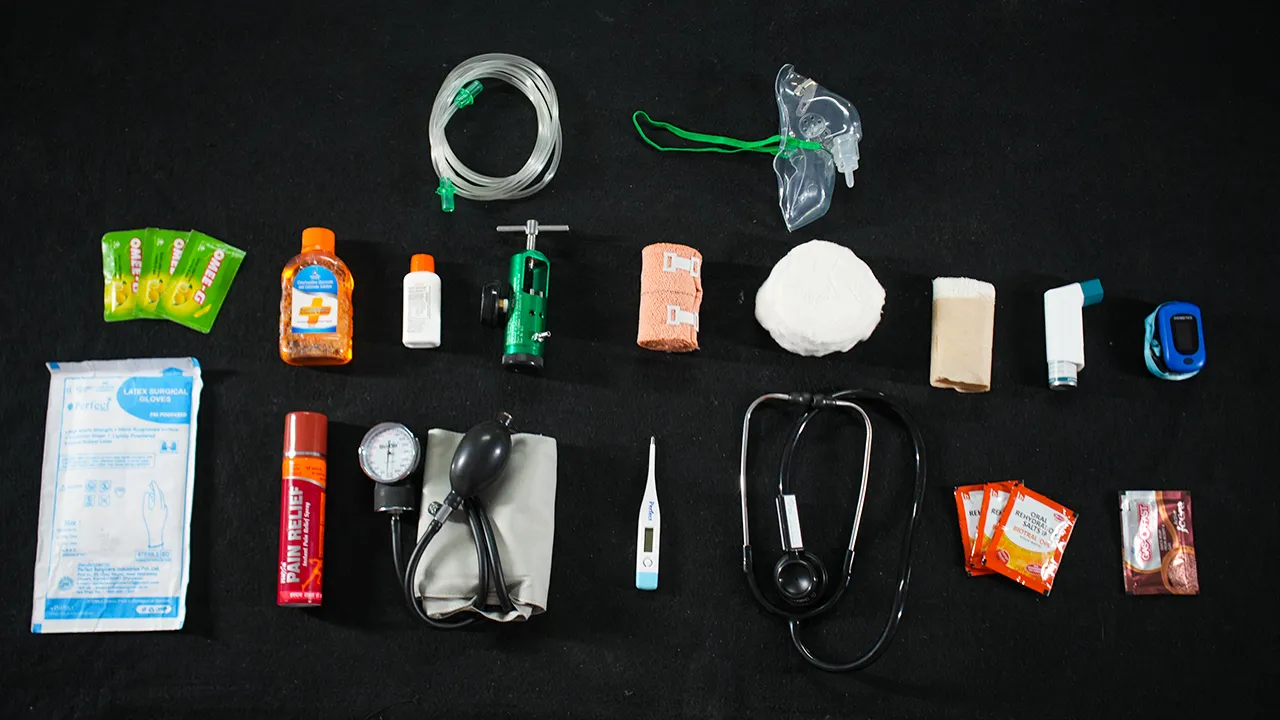
A first-aid kit is one of those things you hope you won’t need, but should never leave behind. On a trek, even a minor problem such as a blister, small cut, headache, or muscle strain can become much more uncomfortable when you’re several hours away from the nearest road or medical facility. For a personal trekking kit, keep it compact and focused on basic needs. Depending on the trek, this can include:
The contents should change according to the duration, remoteness, group size, weather, and individual requirements of the trek. If you take prescription medication, carry enough for the trip and keep it accessible rather than burying it at the bottom of your backpack. Also, don’t carry medicines you don’t know how to use. A first-aid kit is useful only when you understand what its contents are for and when they should be used.
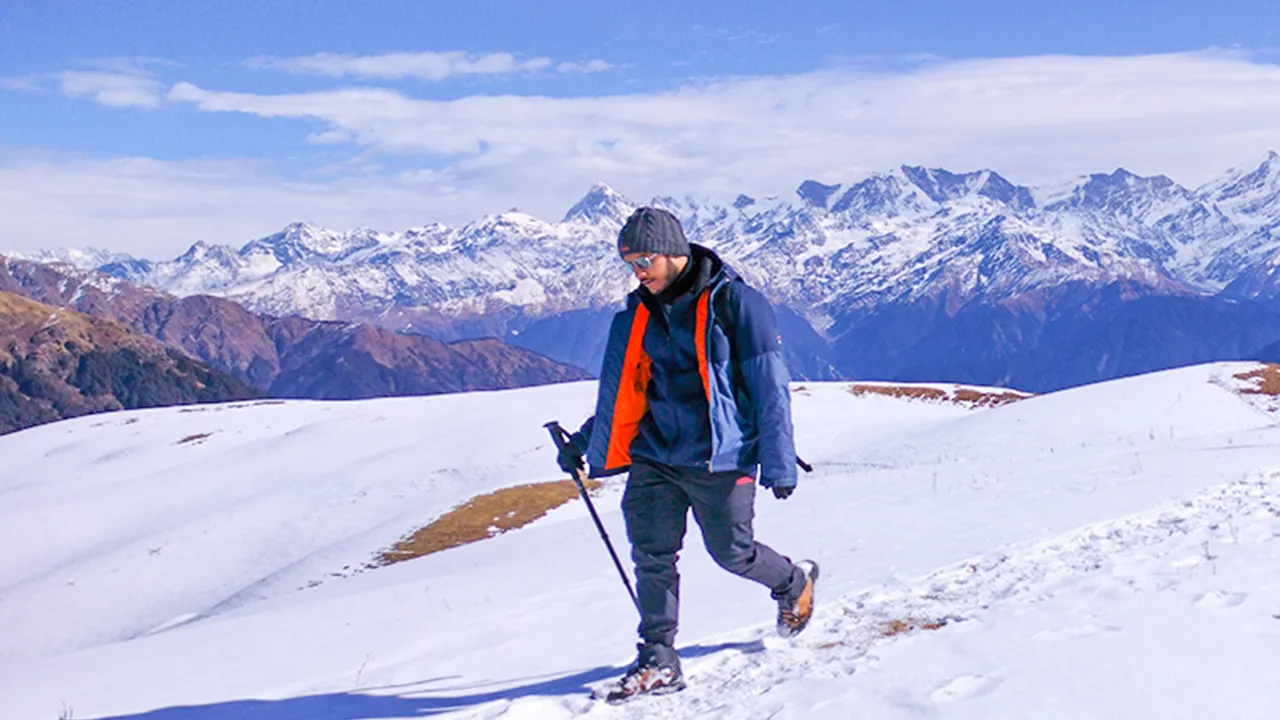
The key to dressing for a trek is layering. Temperatures can change with altitude, weather, and activity level, so your clothing should help you manage sweat, retain warmth, and protect you from the elements. A typical trekking layering system consists of three layers:
You can add or remove layers as conditions change. For example, you may need fewer layers while climbing uphill but extra insulation during breaks or at an exposed campsite. Choose clothing according to the season, forecast, altitude, and expected conditions. Avoid relying on cotton as your main base layer in cold weather, as it retains moisture and dries slowly.
TTH Trek Expert Recommended Brands
The best affordable choice is Decathlon. It has good options that are comfortable for the trek, as well as your pocket.
For high-end trekking clothing, you can shop from Columbia, North Face and La Sportiva.
"Check out our detailed winter trekking guide by Trek Expert to learn about clothes layering and staying warm during your trek."
Now comes technical gear. This is basically the equipment designed for tougher expeditions in challenging terrain and conditions. Unlike simple trekking equipment, technical gear is used for activities such as moving over steep snow and ice, crossing glaciers, or climbing sections where additional protection or rope-based systems are required. The important thing to remember is that technical gear is route-and-activity-specific. You won’t need every piece of equipment on every high-altitude expedition. Let’s check out its types:
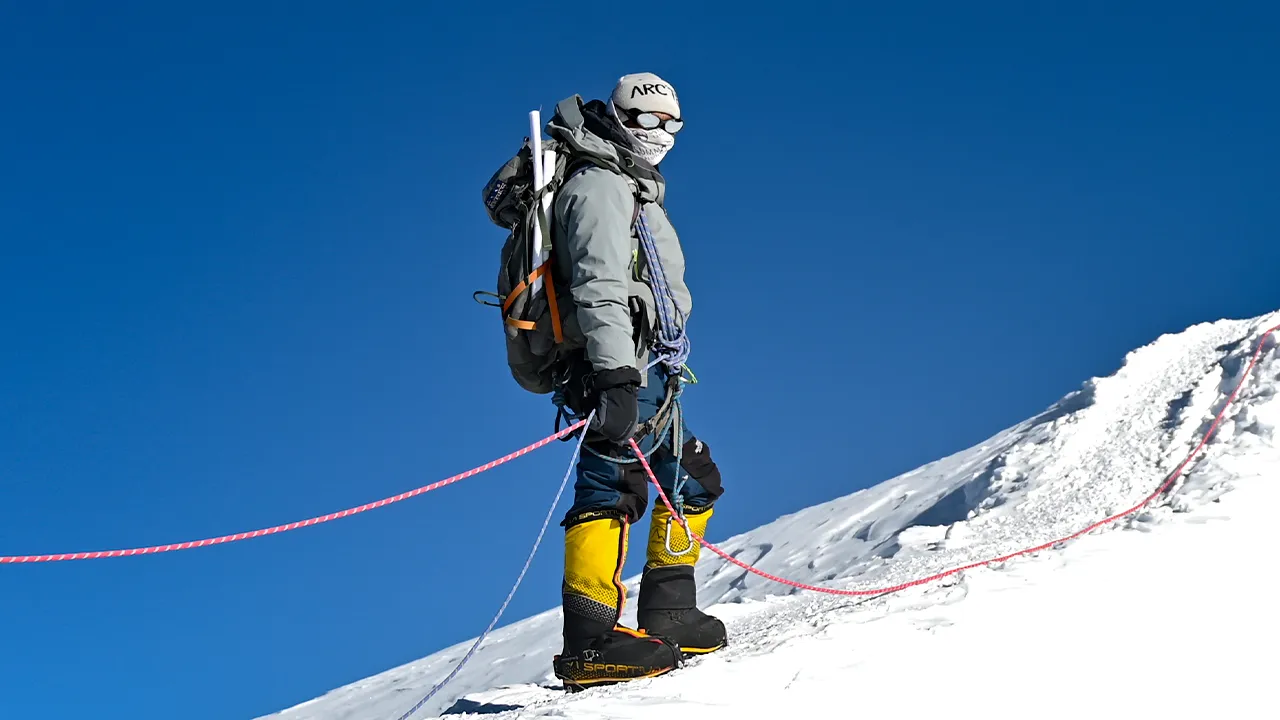
Mountaineering Boots are not anything like your ordinary trekking shoes. These are highly specialized, insulated boots with a hard outer sole designed specifically for extreme cold conditions and are often paired with crampons for better grip. They are usually used in vertical climbing zones. That’s because, as you go higher on the mountains, the altitude increases, and with that, the snow starts hardening. These mountaineering boots then help you protect your feet from the cold and provide the stiffness or compatibility needed for climbing in that hard snow or ice.
Now, one thing to understand is that while all mountaineering boots are waterproof, not all of them are the same. They should be selected according to the altitude, route, temperature, snow, ice, and specific demands of your expedition. Thus, you should always check your shoe requirements for the trek, and also your boot-crampon compatibility and fit before the trip.
TTH Trek Expert Recommended Brands
When going for technical expeditions, be sure to carry the appropriate boots. You can check out the brand Koflach for some good options.
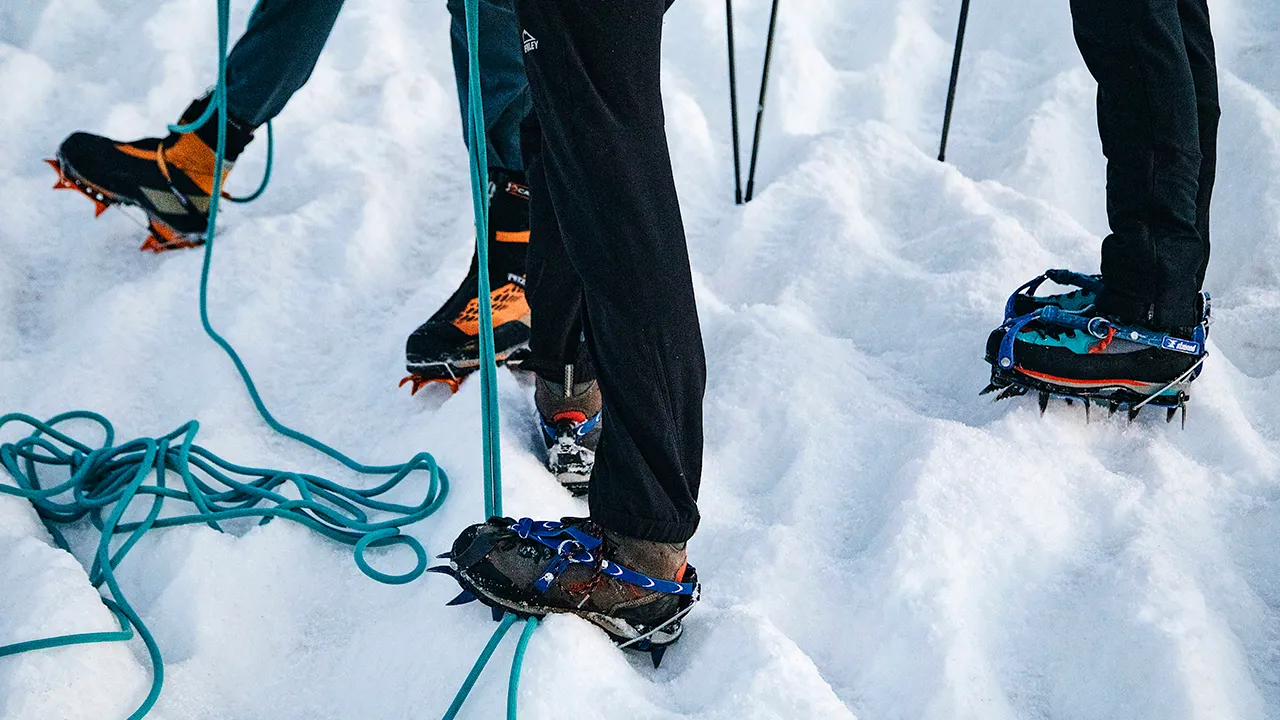
Crampons are attachments like microspikes, but different in many ways. They are usually used for high-altitude climbing terrain. This can include steep snow slopes, hard-packed or icy sections, glacier travel, and technical climbing routes. They have a metal frame that can be clipped onto the boot, with thick, long, rigid spikes that penetrate harder into the surface below while you climb up, allowing you to move across steep or icy terrain with greater control.
MICROSPIKES ≠ CRAMPONS: Microspikes can improve grip on slippery trails, but they are not a substitute for technical crampons when a route requires climbing or travelling on steeper snow and ice. The choice between the two depends on the route, slope, snow conditions, and the activity involved.
Now, the main question is: How do crampons attach?
Crampons are not designed to fit every trekking shoe or boot. They are used with compatible mountaineering footwear, and the exact attachment system depends on the crampon and boot combination. This is important because simply having a pair of crampons does not make them suitable for a particular trek.
For technical mountaineering, the combination of compatible boots + appropriate crampons is part of the overall safety system. The fit needs to be secure before entering snow or ice terrain.
|
Tip:
Don’t buy crampons just because you’re planning a high-altitude trek. First check the specific equipment requirements of the expedition and the type of footwear it requires. On organised technical expeditions, the team will guide you on the appropriate equipment and its use. |
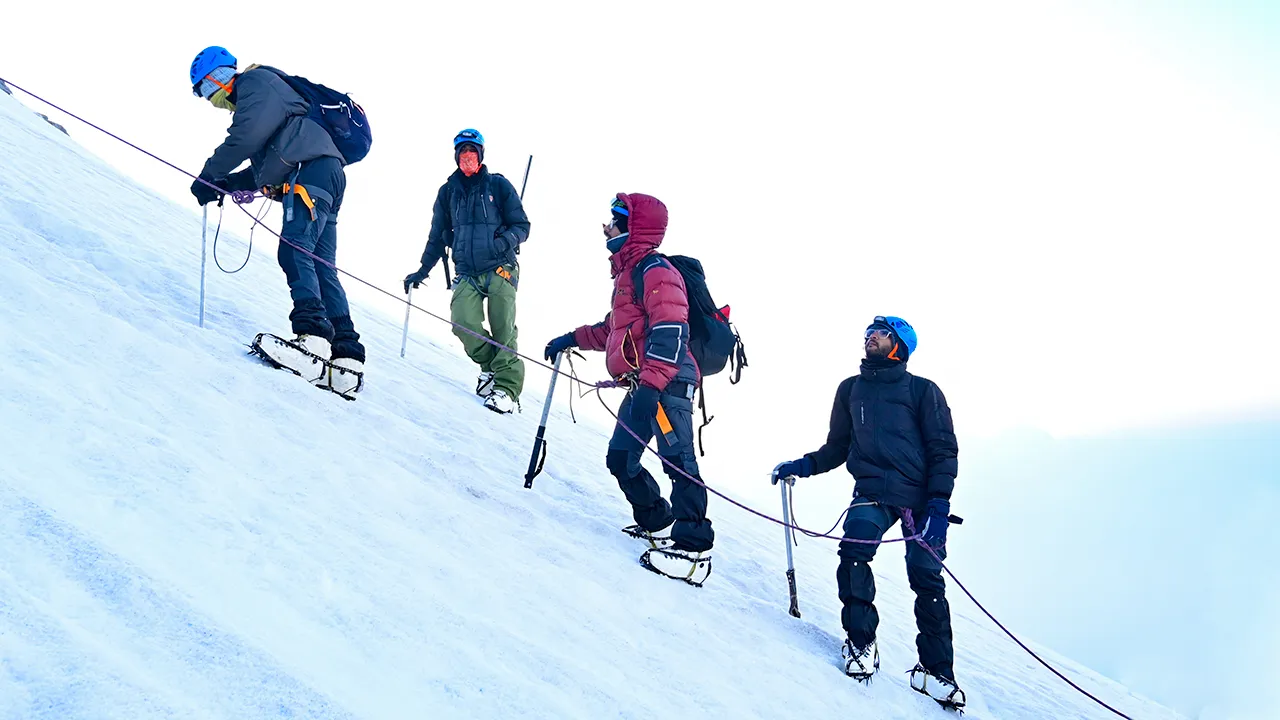
Also known as the ‘third leg of a mountaineer’, the ice axe is one of the most useful pieces of gear used during expeditions. The reason is that when navigating a steep, frozen slope, planting the ice axe into the snow provides a third point of contact, functioning identically to a stabilizing third leg. But that’s not its only use. An ice axe serves multiple purposes. It is made of a shaft, pick, adze or hammer, and spike. So, it can be used to dig into ice, fix anchors, or can itself be fixed as an anchor. Along with that, you can use it to climb icy mountains and, if by any chance, you self-arrest.
But all of this can't be done with just one type of axe. Thus, there are 3 types of Ice axes: walking axes, self-arrest axes, and technical climbing axes. Here’s how they are different:
|
Note:
Ice axes should be used only after some practice and with proper practical instructions. A trekker must know the correct way to use any type of axe, otherwise, it can be dangerous and cause serious injuries. Also, the type of axe required depends on the expedition needs. |
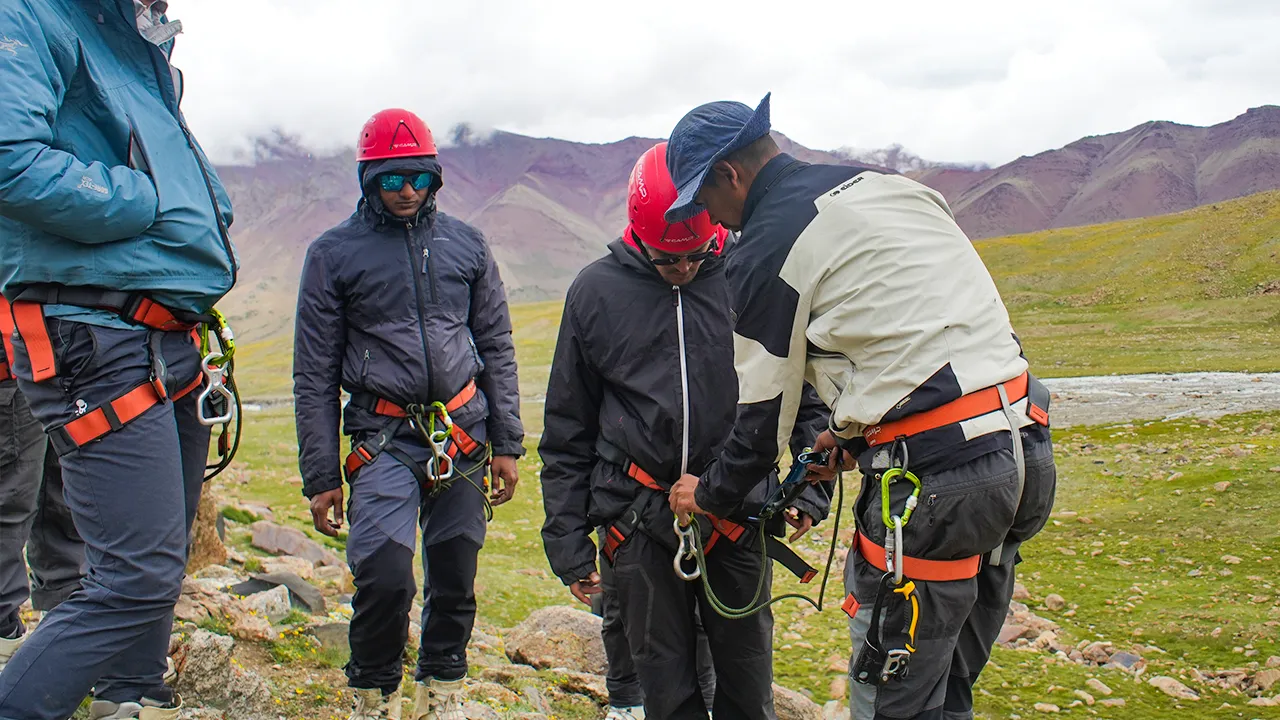
You probably know about the climbing harness. It is like a waist belt worn around your waist and legs that fits around your body, with a strong attachment point at the front. The rope or other climbing equipment is connected to this point, allowing the force to be distributed through the harness rather than putting all the load on a single part of the body. It is used to connect you securely to a rope system. Think of it as the link between you and the rope; if a route requires you to climb, descend, or move along a fixed rope, the harness keeps you attached to that system. A climbing harness becomes necessary when the route involves roped climbing, glacier travel, fixed ropes, rappelling, or other activities where you need to stay connected to a rope for protection.
IMPORTANT: A harness is not simply a piece of safety gear you put on and forget about. It needs to be fitted correctly and used with the appropriate rope systems and techniques. On technical expeditions, trekkers should always follow the instructions of trained guides or climbing professionals.
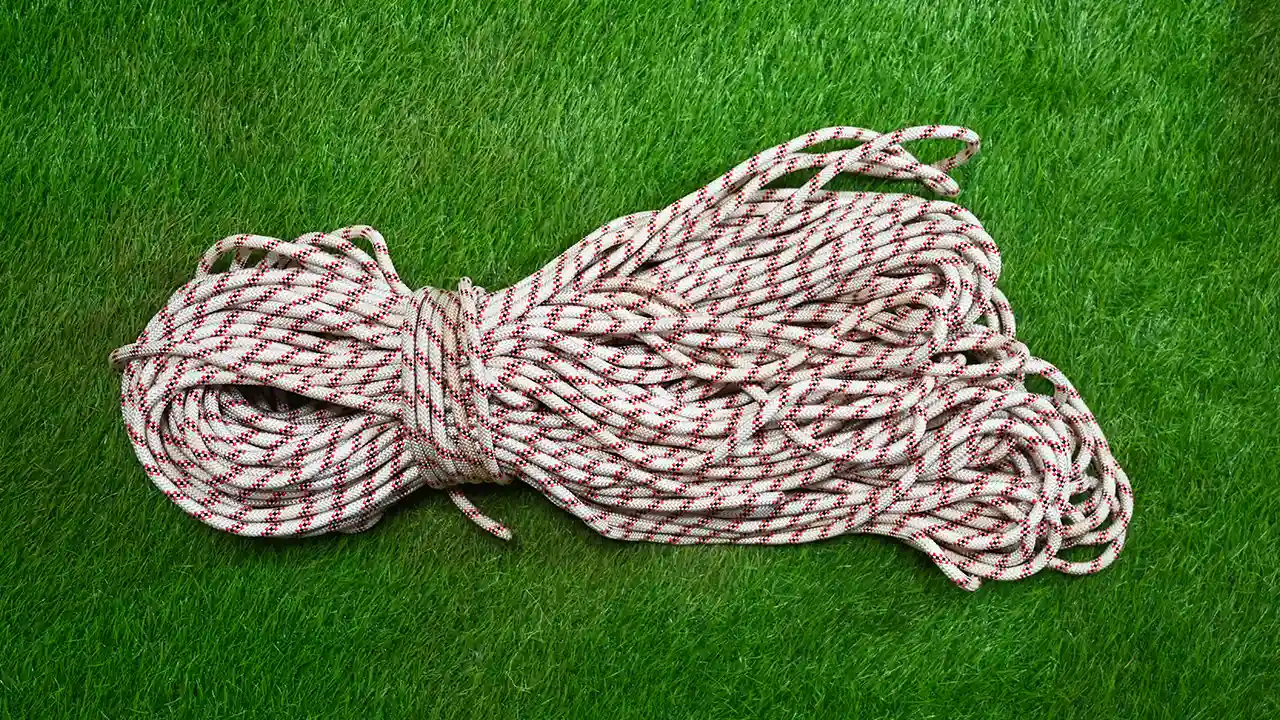
One of the most common and necessary pieces of equipment for trekking, ropes serve various purposes. They are used for climbing, accessing, hauling, or protection (rescuing) tasks. But not all of them can perform the same task. Thus, to make it simple, ropes are divided into 3 major types.
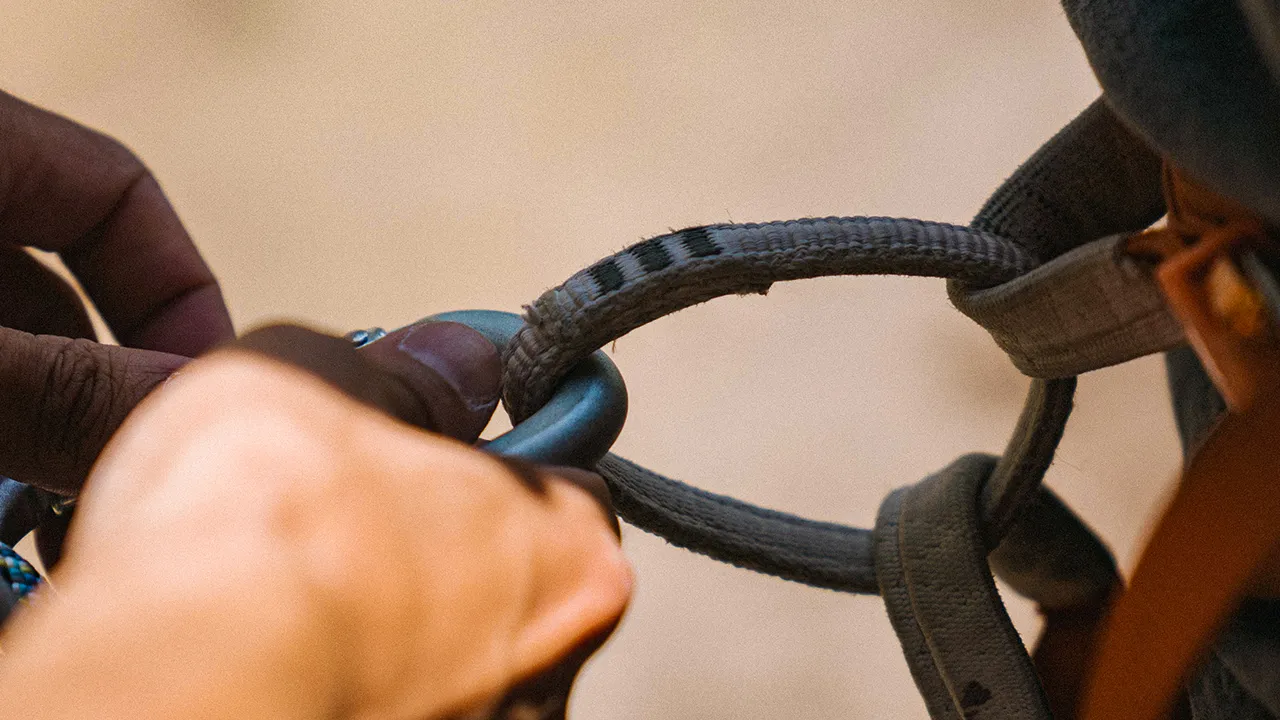
Carabiners and slings: these two are quite small but very important parts of a climbing and rope system. In simple terms, they help connect different pieces of climbing equipment and keep the system together.
A carabiner is a strong metal connector (shaped like a D) with a spring-loaded gate used for attaching one piece of equipment to another. Depending on the setup, it can be used to connect a harness to a rope system, attach equipment to an anchor, or join other components. Carabiners are of 3 types:
A sling is a short loop of strong webbing. It can be used to connect two points, extend an anchor, or create more distance between pieces of equipment when setting up a rope system.
You may not use these pieces of equipment individually. They usually work as part of a larger system involving ropes, harnesses, anchors, and other technical gear.
IMPORTANT: Carabiners and slings are not interchangeable with ordinary clips, straps, or accessories. The type of carabiner, sling, and attachment method must match the climbing system being used. They should only be used as instructed by trained guides or climbing professionals.
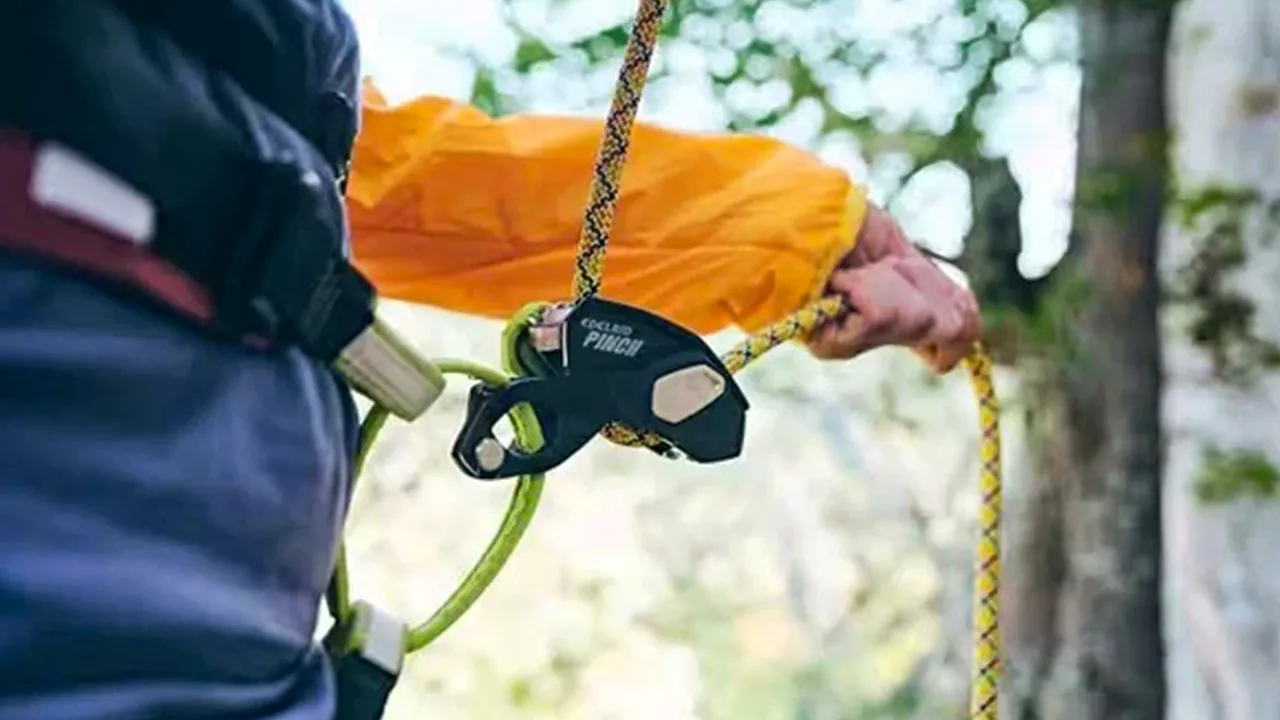
Think of these as devices that help control the rope system. When you are moving on a rope, simply holding the rope with your hands isn’t enough to safely control its movement. A belay device or descender creates friction on the rope, allowing the person handling it to control how quickly the rope moves.
The rope is passed through the device in a particular way, and the shape of the device creates friction as the rope moves through it. This makes it possible to slow down or control a climber’s descent during activities such as rappelling.
Where does it come in?
Now, since they are of various types, the type of device chosen depends on the rope, activity, and climbing system. Using one safely also requires knowing how to thread the rope correctly and how to control the system. So, you must learn it from a trained professional before using it on an expedition.
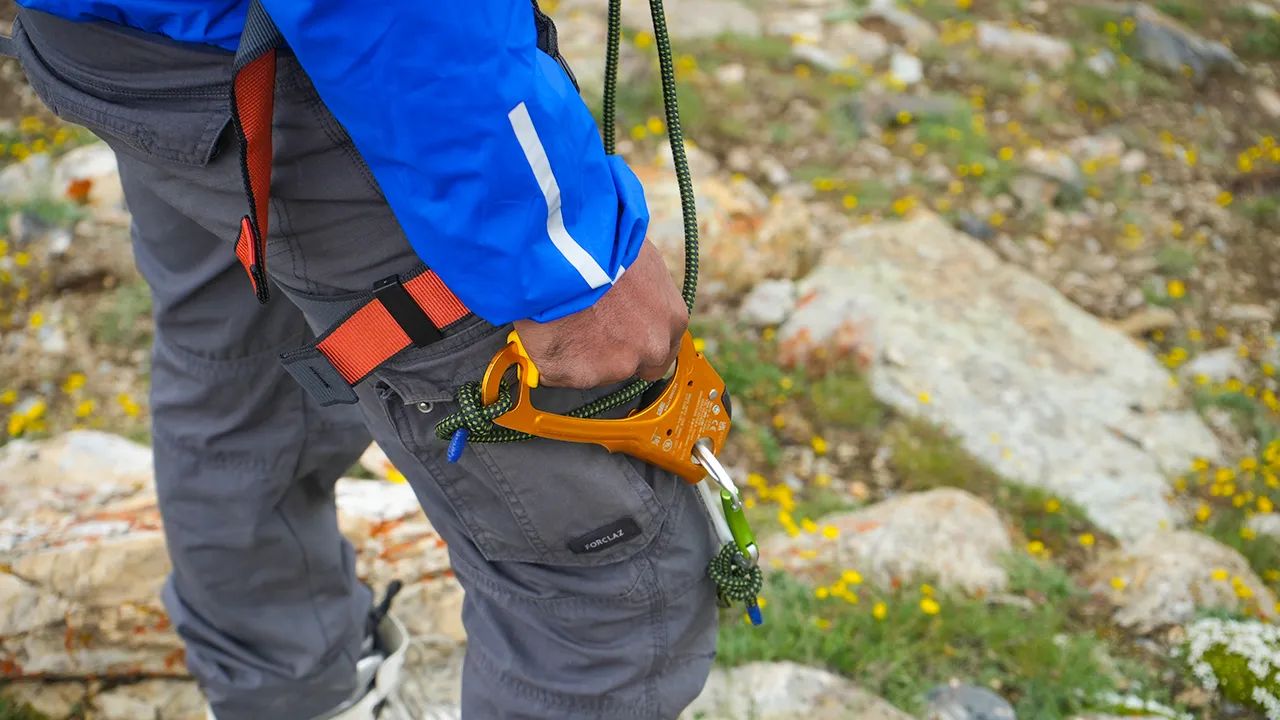
Imagine you’re attached to a fixed rope and need to move upward along it. Holding the rope and pulling yourself up with your hands would be difficult and inefficient. An ascender, commonly called a Jumar, gives you a mechanical grip on the rope and helps you move upward more efficiently while remaining connected to the rope.
Now, where can you use Jumars?
Jumars are designed and sold individually for both left- and right-handed people. Though the operating mechanism is the same for both, the distinction is made for more comfort when using it for specific hands. Also, a Jumar is not used individually on its own. It is part of a larger rope system and is normally used together with a harness, rope, and other safety equipment. The technique requires proper training because the device must be attached and used correctly to maintain a secure connection to the rope.
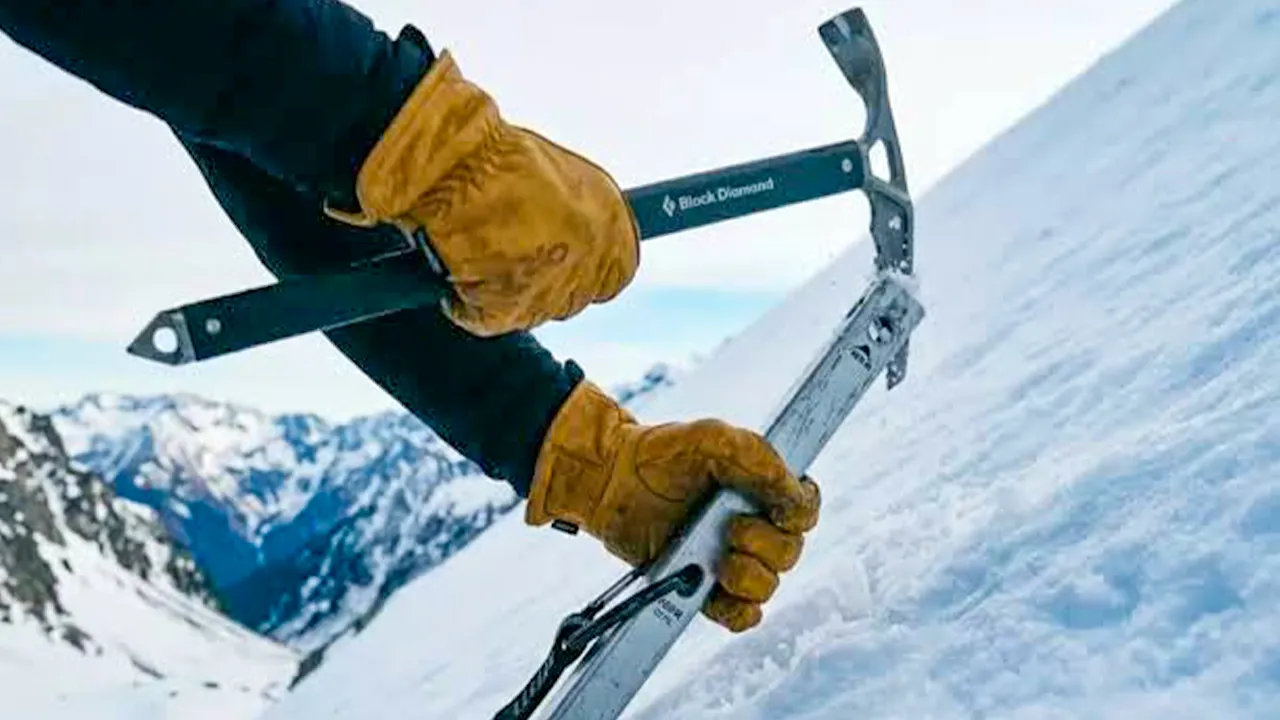
When you’re climbing or travelling across snow and ice, there may be no rock, tree, or other solid object nearby to attach a rope to. This is where snow and ice anchors come in. They create secure points of protection directly in the terrain. The type of anchor depends on what you’re working with:
| Equipment | Where it is used | What it does |
|---|---|---|
| Snow Anchor | Snow slopes | Creates a secure attachment point in suitable snow |
| Ice Screws | Hard ice | Is screwed into the ice to create and anchor or protection point |
| Pickets | Snow and firm snow slopes | A metal stake placed into the snow to provide an attachment point |
These pieces of equipment can be connected to a rope system using appropriate slings and carabiners. They may be used to protect climbers, create belay or rappel points, or secure a rope system while moving through steep snow and ice terrain. The important part is that an anchor is only as reliable as its placement and the conditions around it. Snow consistency, ice quality, slope angle, and the direction of the load all matter. Because of this, snow anchors, ice screws, and pickets should be placed and used by people trained in technical climbing and rope systems.
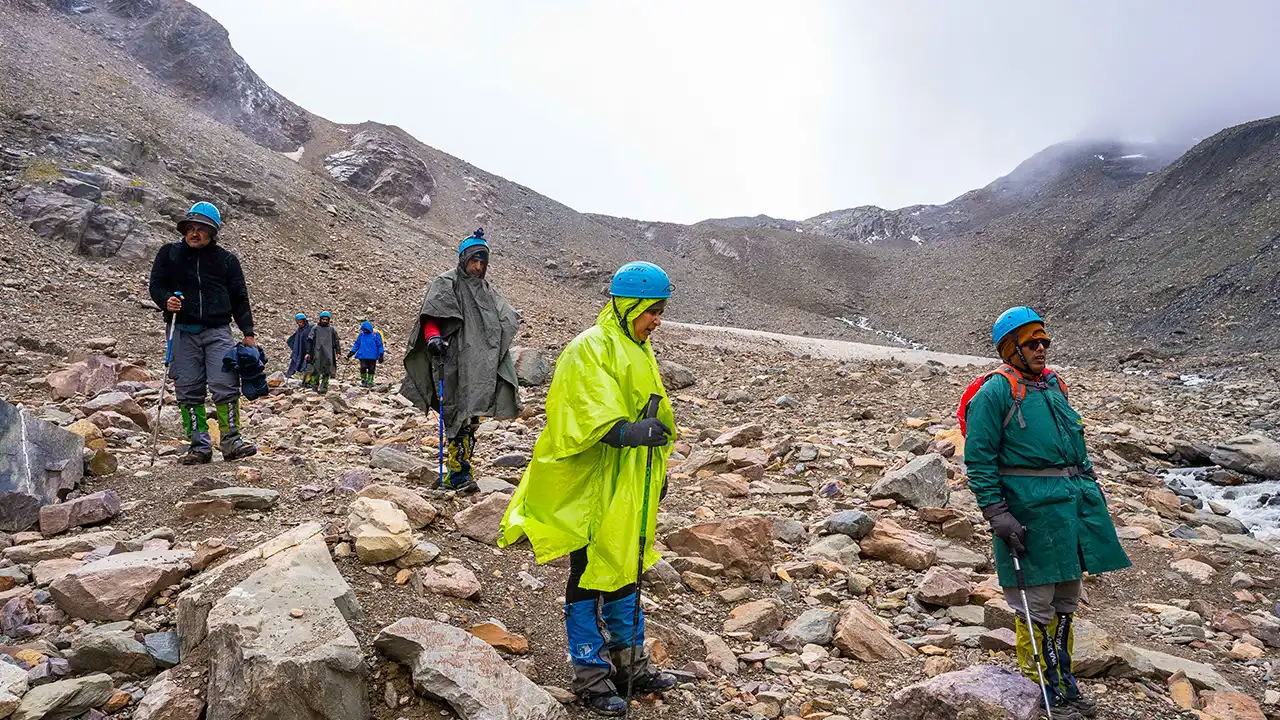
While climbing up the mountain, you would definitely not want to leave your head unprotected on technical terrain. A climbing helmet is designed to protect your head from falling rocks, ice, debris, and impacts that can occur during mountaineering and technical climbing. It has a protective hard outer shell and an internal suspension system that helps absorb and distribute the force of an impact when the helmet is correctly fitted.
|
Remember:
A climbing helmet should fit securely without being uncomfortable or loose. It should also be designed specifically for climbing or mountaineering. A regular bicycle or construction helmet is not automatically a suitable substitute. |
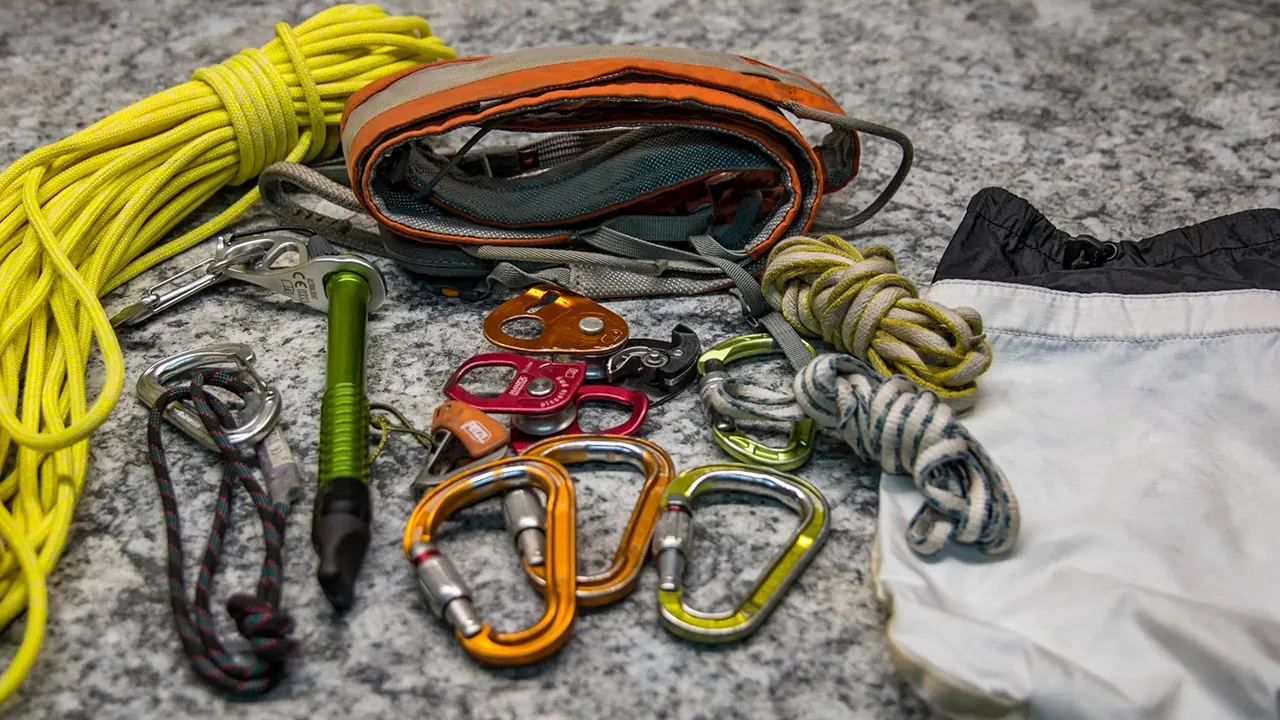
Walking on a glacier is not the same as walking on an ordinary trail. A glacier can have hidden cracks called crevasses. Some crevasses are easy to see, while others may be covered by a thin layer of snow, making them difficult to spot. This is why glacier travel is done as a rope-based activity rather than as a normal walk. Climbers typically move together as a rope team, with each person connected to the same rope system. Depending on the terrain and conditions, they may also use crampons, harnesses, ice axes, and other technical equipment to move safely across the ice.
But what happens if someone falls into a crevasse? This is where a crevasse rescue system becomes important. If a climber breaks through a snow bridge and falls into a crevasse, the rope connecting them to the team can help prevent a deeper fall and allow the rest of the team to secure the situation. The rescue team can then use equipment such as ropes, pulleys, carabiners, slings, and ascenders to build a hauling system and bring the person back to the surface.
Think of it as a system with two stages:
Keep in mind, crevasse rescue is a technical skill that requires proper training and teamwork. Carrying the equipment alone is not enough; everyone involved needs to understand how the system works and how to use it under pressure.
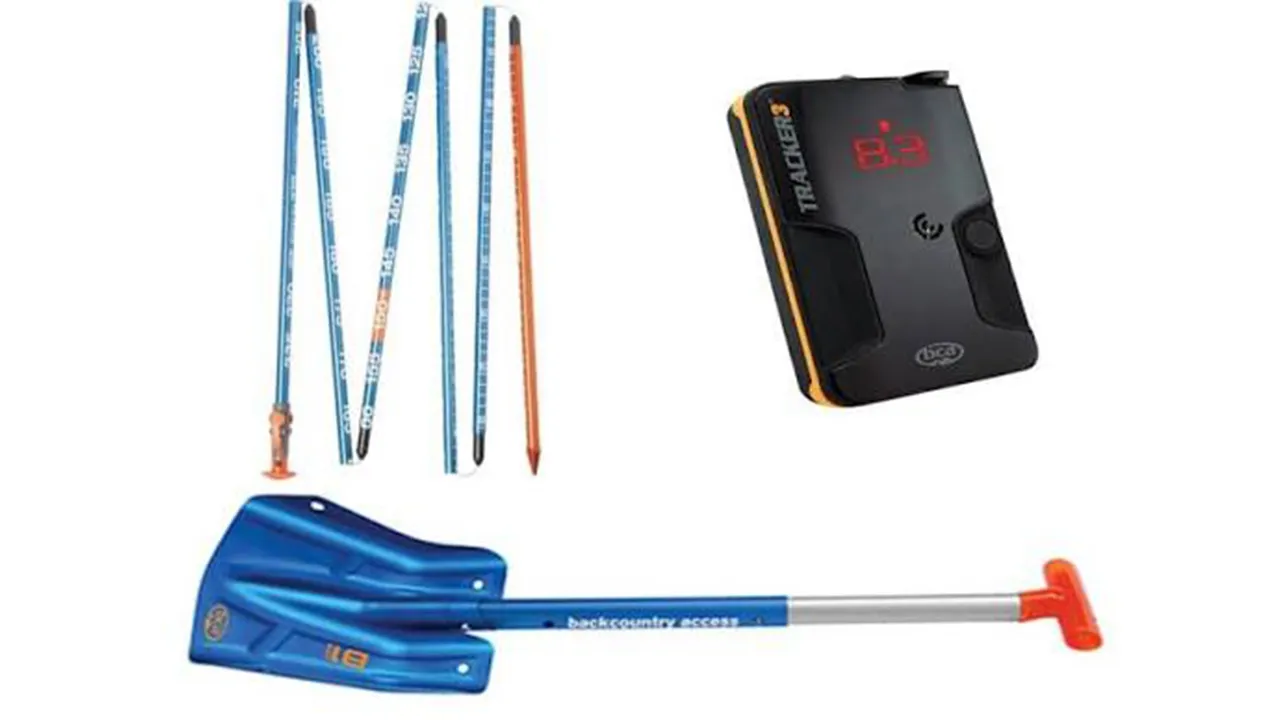
In an avalanche rescue, finding the buried person quickly is critical. A transceiver, probe, and shovel work together as a rescue system, with each tool handling a different part of the process.
Think of it as: Find → Pinpoint → Dig.
Let’s understand this.
An avalanche transceiver is a small electronic device worn by everyone in the team. It can transmit a signal from a buried person’s device and, when switched to search mode, helps rescuers locate that signal beneath the snow.
Once the search has narrowed down the likely location, a long, collapsible probe is pushed into the snow to locate the person more precisely and determine how deep they are buried.
Once the person’s position and depth are established, a sturdy avalanche shovel is used to move the snow and reach them as quickly and efficiently as possible.
These three tools are designed to work together, not independently. They are relevant when travelling through avalanche-prone terrain, but carrying them is only one part of avalanche safety. Everyone in the group needs proper training and practice in avalanche rescue techniques before entering such terrain.
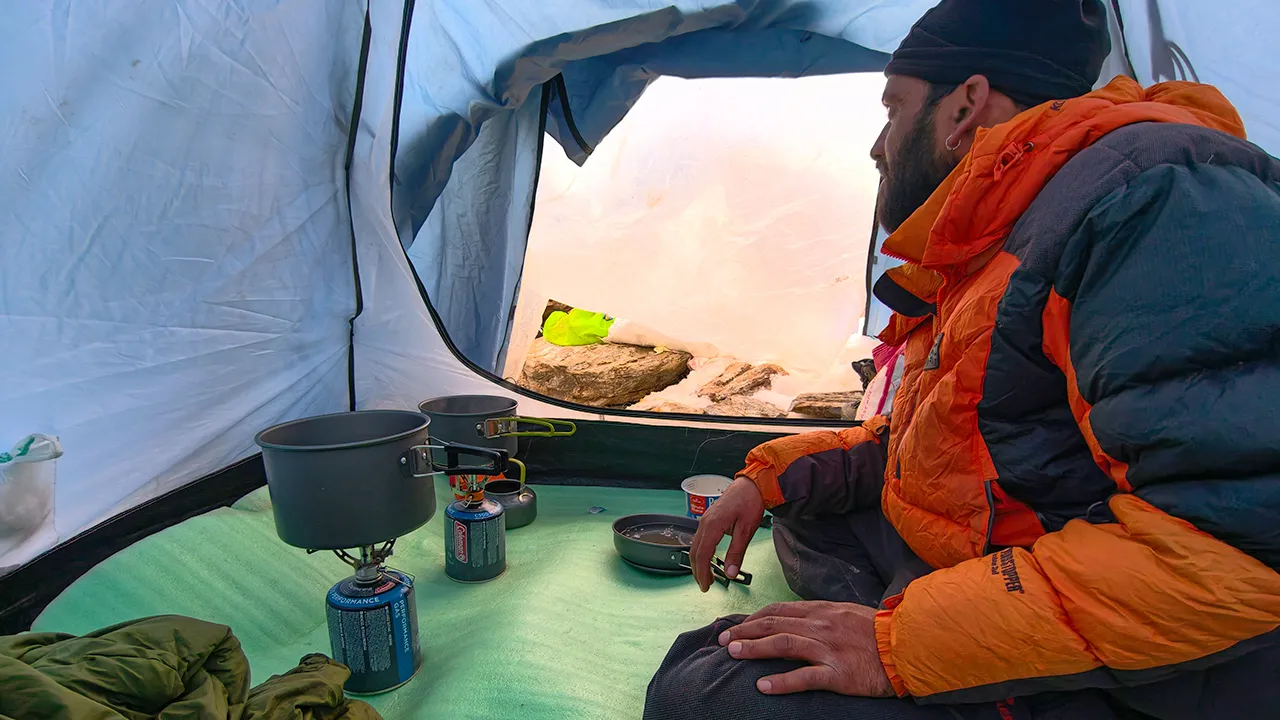
On a regular trek, your tent and sleeping bag mainly need to keep you comfortable through the night. On a high-altitude expedition, your shelter and sleeping system become part of your protection from the environment.
Expedition Tent: An expedition tent is built to handle stronger winds, snow, and harsher weather than a standard camping tent. Its structure, fabric, poles, and anchoring system work together to keep the shelter stable in exposed terrain.
Sleeping System: A sleeping bag provides insulation by trapping warm air around your body, while the sleeping mat creates another layer of insulation between you and the cold ground. At high altitude, choosing the right temperature rating and insulation becomes particularly important because temperatures can drop significantly at night.
Expedition Stove: At high altitude, a stove is used to melt snow or ice for water and prepare food and hot drinks. It needs to be suitable for the expected conditions and fuel availability, as cold temperatures and altitude can affect stove performance.
|
Note:
The right combination depends on where you’re going, how high you’re climbing, how long you’ll be there, the expected weather, and how many people need to share the equipment. On organised expeditions, these requirements are usually planned as part of the expedition’s equipment and logistics rather than being left to individual trekkers. |
TTH Trek Expert Recommended Brands
TTH provides its own tents for organised treks, but independent trekkers and expedition planners should get suitable tents for their personal gear requirements. For those looking to explore expedition-grade tents for high-altitude adventures, Tasmanian is a brand worth considering for its range of outdoor and expedition equipment.
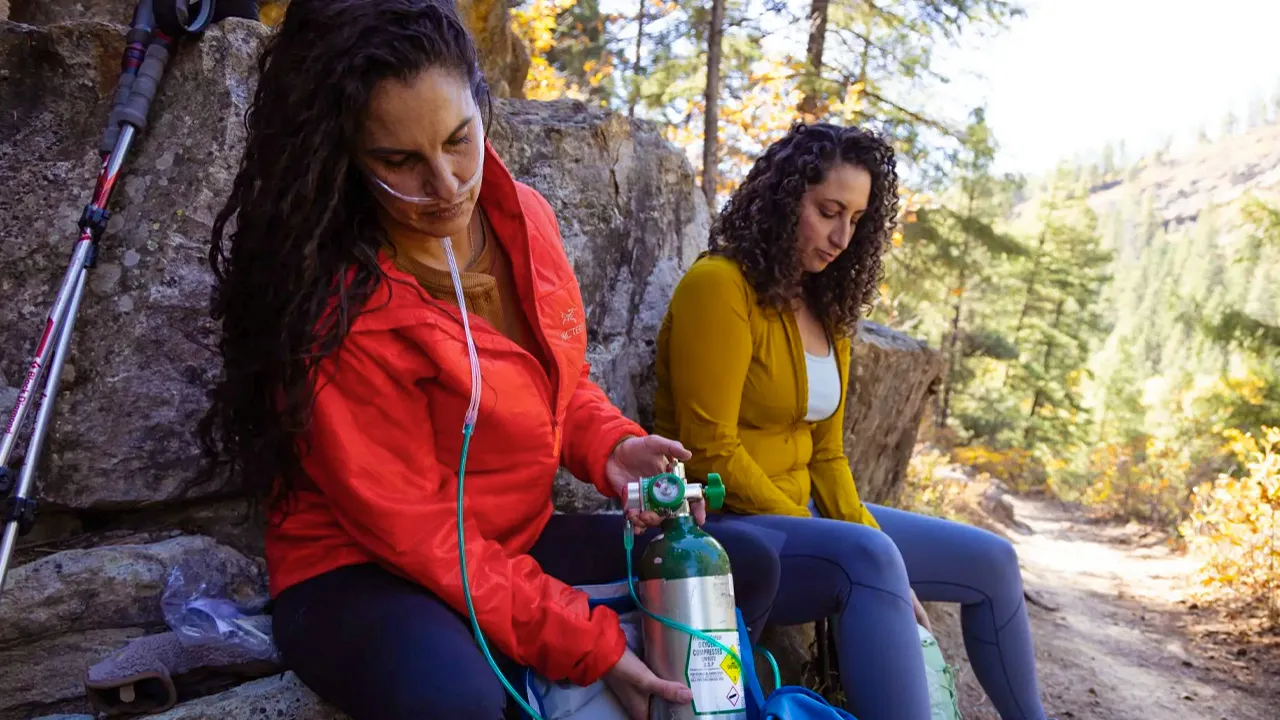
As you might know, there is very little oxygen available in the air at extreme altitudes. So, cold is not the only problem you have out there. But there's a solution. A supplemental oxygen system! This provides additional oxygen when the body is unable to get enough from the surrounding air. The system generally includes an oxygen cylinder, regulator, tubing, and a mask or other delivery system.
On high-altitude expeditions, supplemental oxygen may be carried for specific sections or as part of an emergency setup. It can help support a climber when oxygen levels become dangerously low, particularly at extreme elevations or during a medical emergency.
Now, it is important to understand that supplemental oxygen is not regular trekking equipment. It is specialised expedition equipment, and its use requires proper planning, appropriate equipment, and trained personnel. The decision to use it depends on the expedition, altitude, individual condition, and medical or expedition protocols.
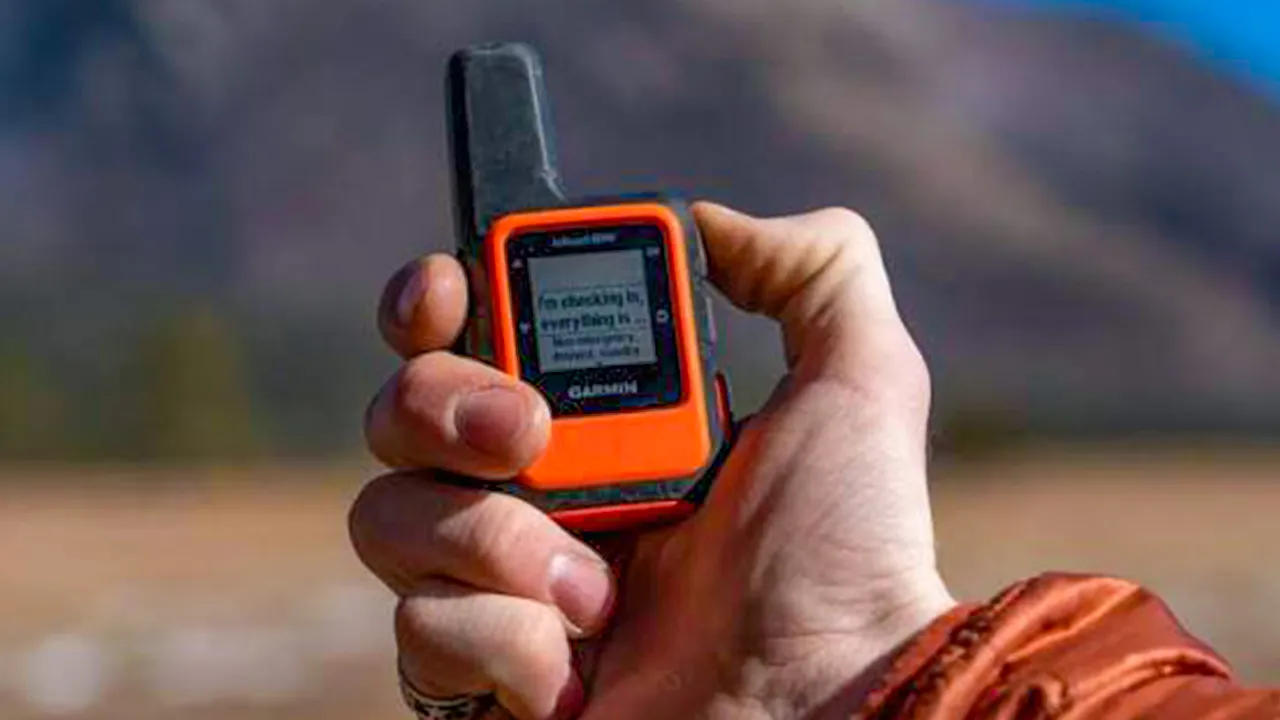
This is one of the most important parts of technical gear. If you are in danger and far beyond mobile network coverage, how do you call for help? On remote expeditions, you might not find any mobile coverage. That is when communication and location-tracking devices help provide an important link to the outside world. Different systems work in different ways; some help send a message from the mountains, while others help rescue teams locate a person in an emergency. Here’s how it works:
A satellite messenger uses satellite networks to send messages and, depending on the device, share your location even when there is no mobile network. It can be used to communicate with a support team or send an emergency alert when you’re in a remote area.
An AVD is designed specifically for avalanche situations. It works by transmitting and receiving a signal, allowing rescuers equipped with compatible devices to search for a buried person. In an emergency, the signal helps narrow down the person’s location beneath the snow.
| Now, one might get confused between a satellite messenger and AVD. Here is how they are different. | ||
| Satellite Messenger | Avalanche Victim Detector | |
| Purpose | Communication and sharing location | Finding a person buried in an avalanche |
| How it works | Connects to satellites to send message/location | Shares and receives a short-range radio signal between avalanche transceivers |
| Who uses it? | Trekkers, expedition teams, remote travellers | People travelling in avalanche terrain |
| Emergency use | Can send an SOS/message to an external rescue or support team | Helps rescuers locate a buried person under the snow |
| Works without a mobile network? | Yes, if satellite coverage/device conditions allow | Yes (it does not depend on mobile or satellite networks) |
| Typical range | Satellite dependent | Short-range, designed for avalanche search |
A RECCO reflector is a small, lightweight device that can be incorporated into clothing, footwear, or other outdoor equipment. It does not transmit a signal on its own. Instead, it can reflect a signal from a compatible RECCO detector, helping trained rescuers locate a person in certain search-and-rescue situations.
So, while these devices all involve sending or detecting signals, they are not interchangeable. A satellite messenger is primarily for communication and location sharing, an AVD is designed for avalanche rescue, and a RECCO reflector provides an additional way for trained rescuers to locate a person using a compatible detector.
|
The key takeaway:
These devices can improve your chances of being located in an emergency, but they are not a replacement for route planning, communication protocols, avalanche training, or an organised rescue system. |
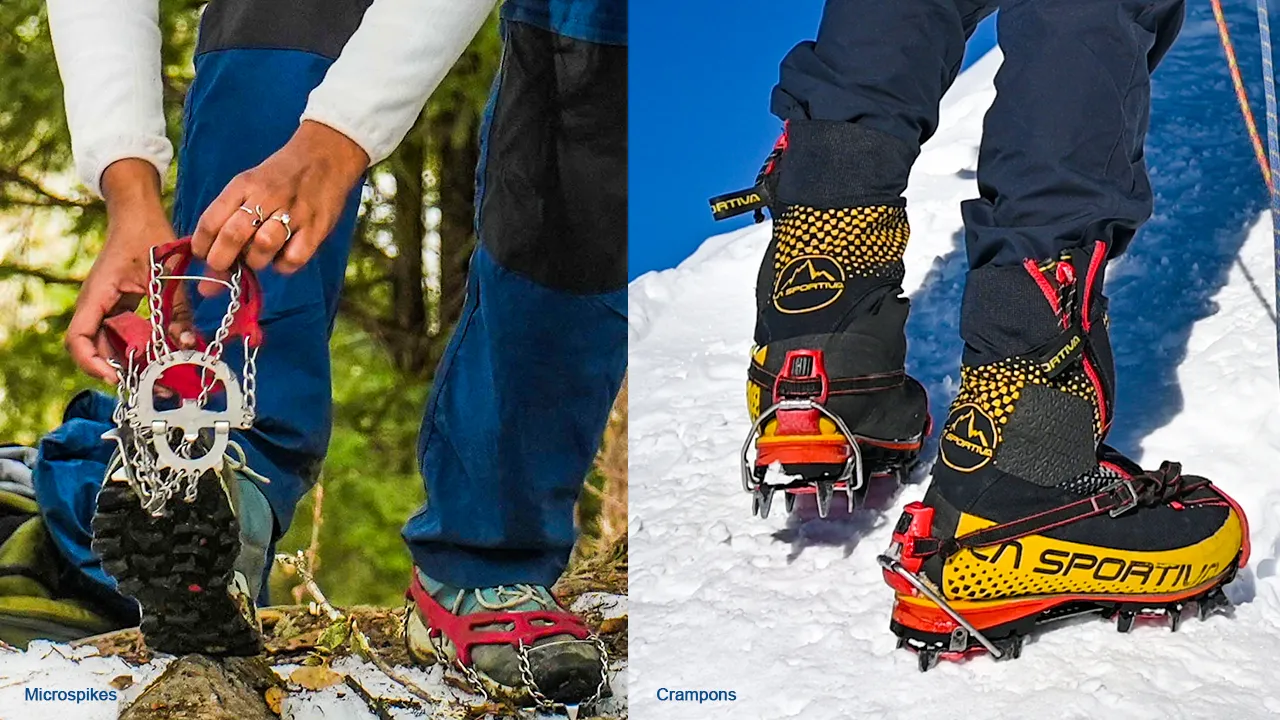
Microspikes and crampons both improve your grip on snow and ice, but they are designed for very different levels of terrain. Microspikes are lightweight devices for walking on icy trails and compacted snow, while crampons are stronger, more rigid, and designed for steeper snow and ice terrain. The right choice depends on the route, the condition of the snow or ice, the steepness of the terrain, and the footwear you are using.
Here’s how the two compare:
| Features | Microspikes | Crampons |
|---|---|---|
| Purpose | Extra grip on icy trails and compacted, low-angle snow | Traction for firmer snow, ice and mountaineering terrain |
| Points | Usually shorter points or chains | Sharper, longer points with design suited for different terrains |
| Footwear | Often fits many trail shoes or boots, depending on the model | Require compatible boots and correct fits |
| How to Use | Fit securely over footwear and check that they do not shift | Fit to compatible boots and learn appropriate crampon techniques |
| Limitations | Not designed for steep technical snow or ice climbing | Can snag or be unsafe if used incorrectly; requires practice |
Choosing the right gear is only half the job. It also needs to fit your footwear securely and stay in place while you move. For microspikes, make sure the flexible harness sits firmly around the shoe and that the metal points are positioned correctly underneath the sole. They should feel secure without slipping sideways or coming loose as you walk. As compared to them, crampons require more care because they are used in steeper and more technical terrain. They must be compatible with the mountaineering boots you are wearing and fitted so that the points sit correctly under the sole. A loose crampon can shift unexpectedly and affect your footing.
A few things to remember:
Trekking gear includes essential equipment used for comfort, protection and navigation during regular hikes and multi-day treks. Technical expedition gear includes specialised equipment such as crampons, ice axes, climbing harnesses and ropes, which is used for activities involving steep snow, ice, glacier travel and technical climbing.
Technical equipment should be used only with appropriate instructions, supervised practice, and a route-specific plan, or it can cause serious injuries.
No. Microspikes are not a safe substitute for crampons because of their design and spikes. Crampons are made with long, firmer spikes, specifically for walking on steep snow, hard ice, glacier travel, or technical climbing.
No. Requirements depend on snow and ice conditions, slope, route, and the trek operator’s assessment. Some routes may need traction aids; others may not.
Depending on the route, a trained team may use ropes, harnesses, carabiners, slings, rescue pulleys, and friction devices, along with suitable footwear and traction.
18 November 2026

Trek updates, stories & mountain insights.
Tips and insights for every trekker.

Rishikesh is a popular tourist destination in Uttarakhand, and there is a valid reason for its popularity.
For Trek The Himalayas (TTH), safety is paramount the foundation of everything we do. Right from the inception, we have been actively safeguarding the health, lives, and overall well-being of trekkers, staff, and the environment.
Winter is almost here, and you're still planning on following the same routine. Sitting in a blanket, sipping on hot tea, and binge-watching your favorite movies.
Every season in the Himalayas has its own way of showing off the mountains, but winter reveals a different side of them, one that feels like a whole new world.
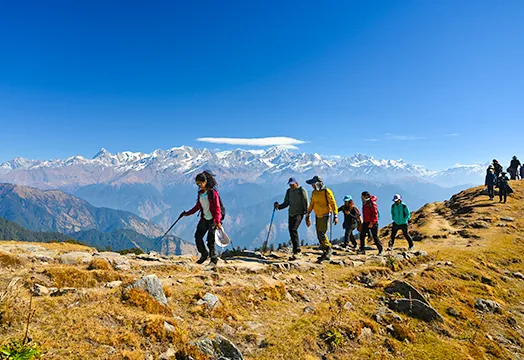
As monsoon season comes to an end, it washes away all the dust and haze that remains in the valleys throughout the summer, and then?
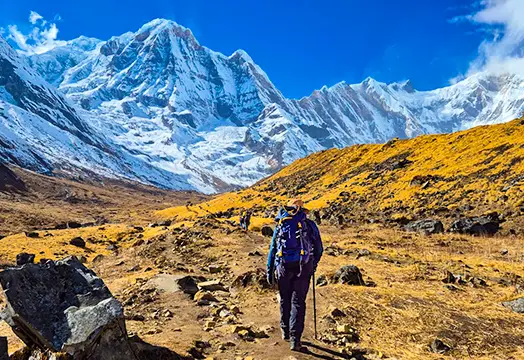
Located in north-central Nepal's Gandaki Province, Annapurna is the world's 10th highest and one of the most challenging mountains on the planet. Its height rises to 26,545 feet. Yet reaching Annapurna base camp is a far more accessible adventure, drawing trekkers from around the world every single season.
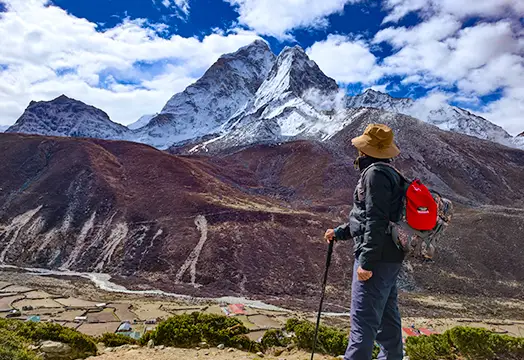
What does it feel like to stand on a trail where the mountain before you is worshipped as a goddess? For most of us, it's an adventure. But for the local communities who live in its shadow, it's something closer to faith. That mountain is Everest.

Over the last few decades, trekking has driven a profound shift: rural economies and local communities are reaping direct and indirect benefits.

Hiking teaches you to fall in love with the outdoors. Trekking teaches you to endure it. Mountaineering teaches you to respect it completely.

There are only a handful of Himalayan regions that hold profound spiritual significance as well as immense natural beauty. The Gaumukh Tapovan trek is one such destination that wonderfully combines adventure, divinity, and extraordinary Himalayan beauty.
18 Nov 2026
17 Nov 2026
16 Nov 2026
15 Nov 2026
14 Nov 2026
13 Nov 2026
12 Nov 2026

11 Nov 2026
10 Nov 2026
09 Nov 2026